
Once the installation of Pi-Hole is finished, we have to go to the configuration from the administrator panel via web, from a browser we have to indicate the Web address of the NAS and the port that we have assigned to Pi-Hole (http://192.168.1.xx:puerto/admin). Log in and enter your password by clicking on Login.
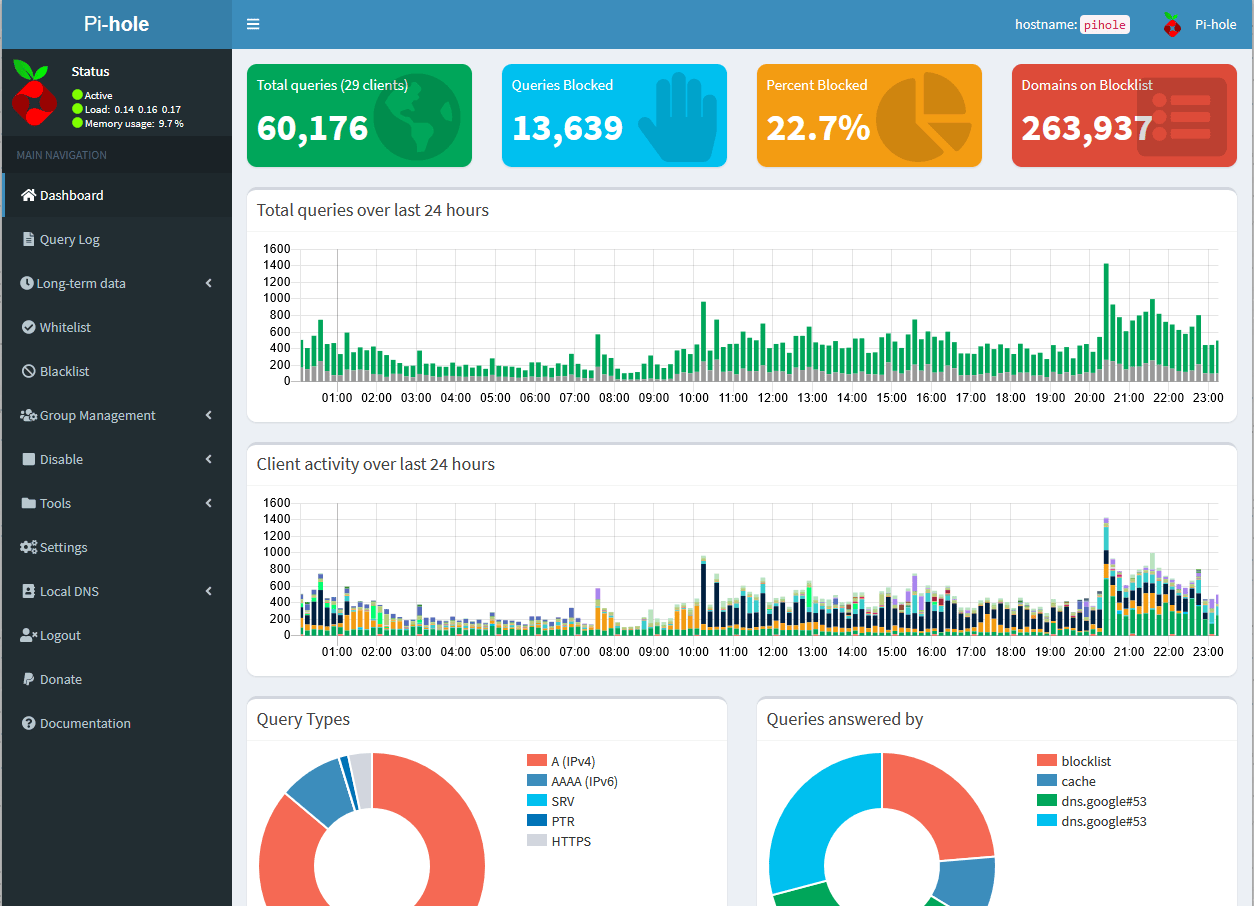
Once inside, we will access the data visualisation panel. From here we can see all the options available in the menu in the left-hand column of the screen.
To Configure the network
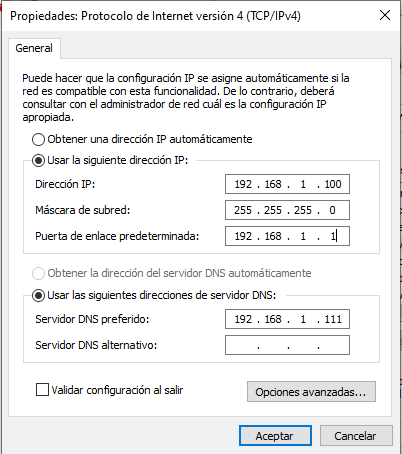
For Pi-Hole to work, all the devices on the network must have the IP address of the NAS configured as the DNS server address.
The quickest and easiest way is to do it in the router that manages the network, so you don’t have to do it manually computer by computer. That is, we put the ip of our router, we enter and depending on each brand and model, we change the dns and put the ip of NAS as DNS server 1, it would look like this:
![]()
You can put as DNS server 2, Google’s, 8.8.8.8, but depending on the system or devices that we are going to connect, it may cause problems and not filter well, in my case, if I put Google’s DNS as secondary, the mobiles catch the latter. And in this way it doesn’t filter well.
Once the DNS has been changed, restart the devices with Automatic IP and they will automatically obtain the IP of our NAS as DNS server. In the same way for those that have been assigned a reserved IP in the Router.
For equipment with static (fixed) IP configured manually on the device itself, the primary DNS must be changed in the configuration of the corresponding network adapter.
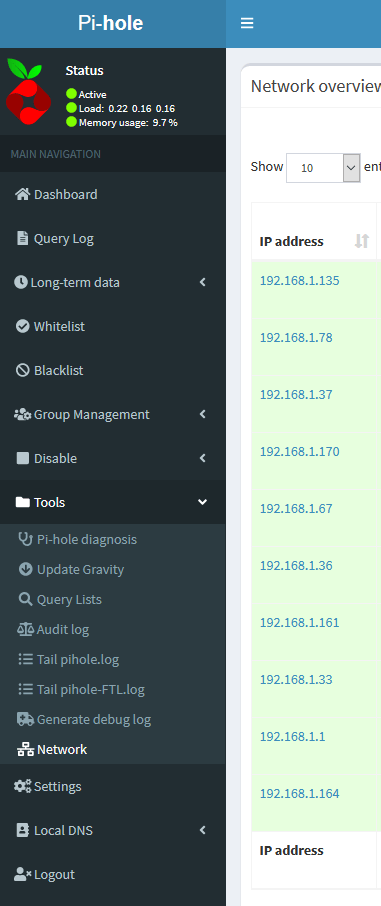
From Pi-Hole we can see which computers are connected to the network and which of them are using Pi-Hole, filtering advertising and prying eyes in the “Tools” section and within “Network” of the web control panel, in the column indicated above on the left.
Updating Lists
From the Group Management -> Adlists section you can modify the lists that Pi-hole uses to allow or block addresses.
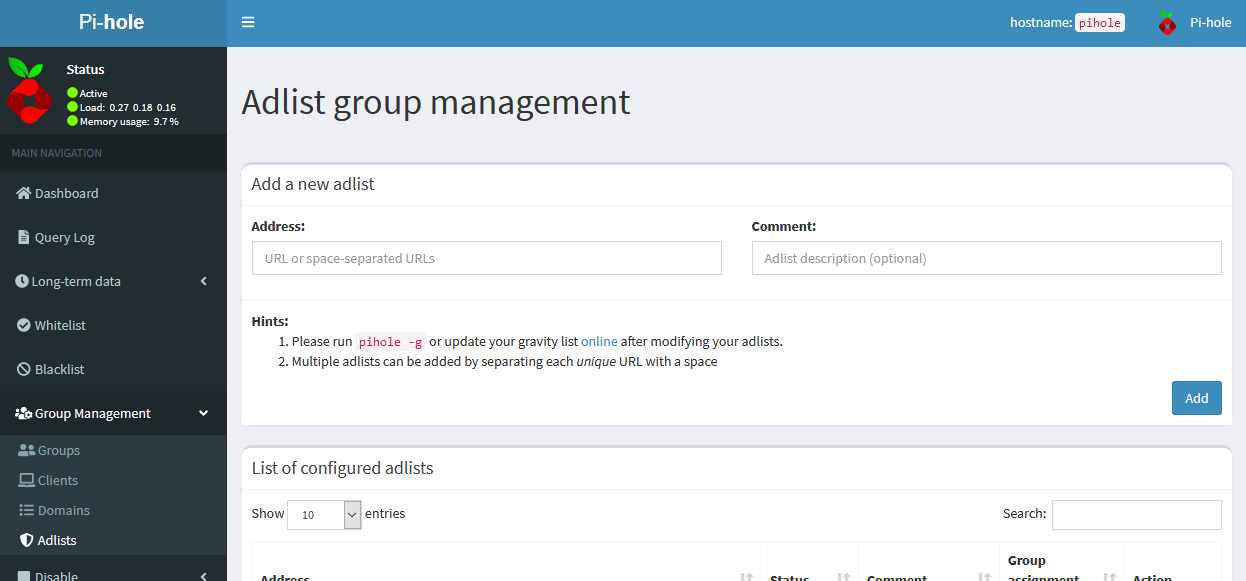
Although there are many websites on the Internet dedicated to compiling lists, my personal recommendation is to use the lists that appear in green at https://firebog.net/ and every few months (another option is https://filterlists.com/), come back to check if new lists are available. The lists themselves are self-updating, so there is no need to reconfigure them, even if you add or remove things within them.
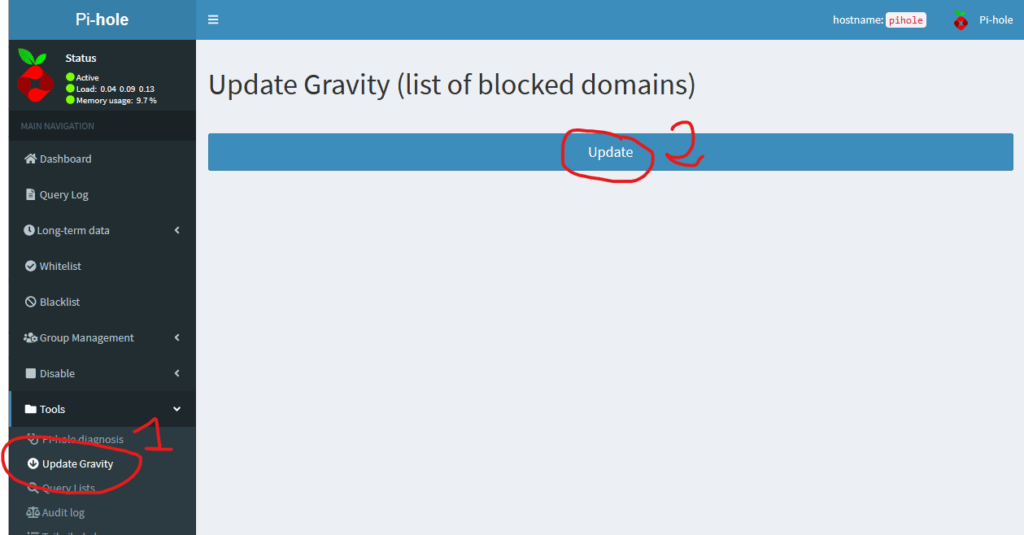
Once we have added the lists, we proceed to update them, and we do it from the menu “Tools” “Upadte Gravity”
Backing up
When we have finished doing everything and it is working OK, the best thing to do is to make a backup copy, in case we have any failure in the future, to be able to leave everything as it was.
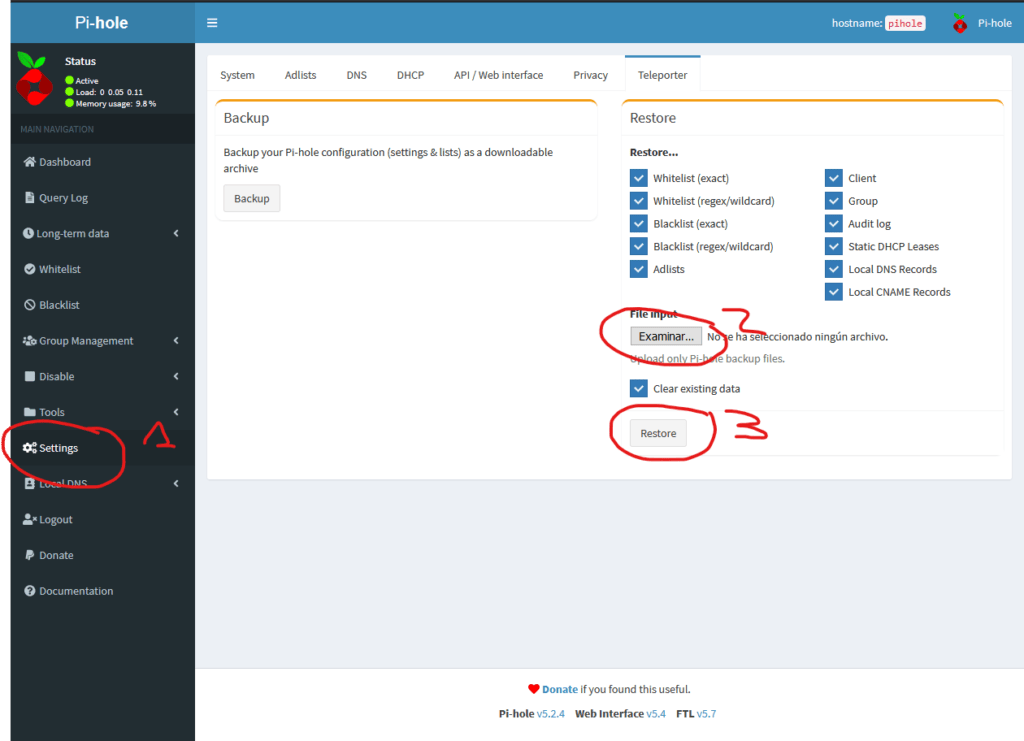
To do this task we do it from the panel, we click on “Settings” “Teleporter”
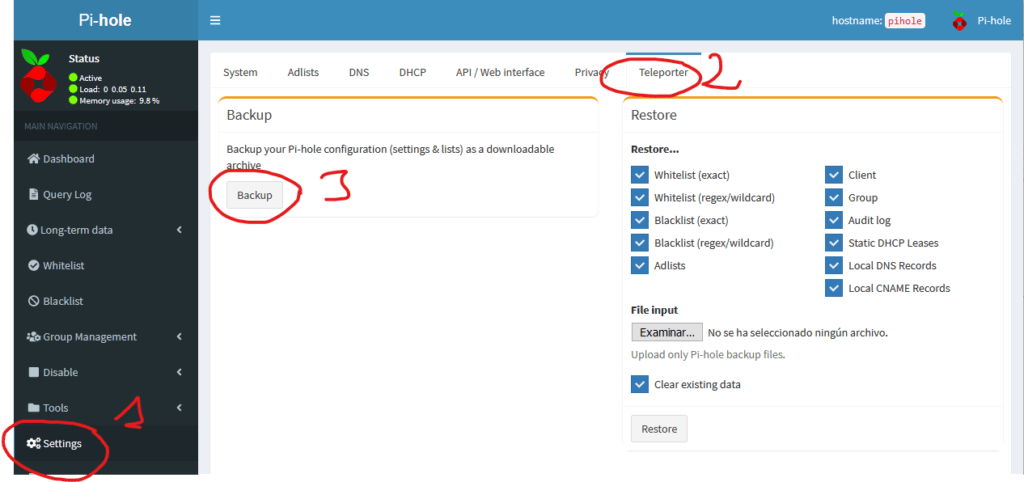
This image would be to make the copy, following the steps. If we want to do the opposite, that is, we want to restore a copy, we would have to choose the backup file we had previously made from “browse” and click on “Restore”. We can recover the complete backup, or we can choose the parts we want to restore.
It is recommended to back up every change we make.
With all these steps we will have our Pi-Hole installation ready to use and enjoy an ad-free internet connection, as well as faster connections on our mobile phones and tablets by not having to load those advertising banners that abound nowadays and that we hate so much.