Pi-Hole is a Linux network-level Internet ad blocker and tracker application that acts as a DNS filter (and, optionally, a DHCP server), designed for use on a private network.
What is a DNS filter? A DNS filter, or DNS blocker, is a DNS server that provides false information to prevent the use of a domain name. It is designed for use on network-embedded devices such as Raspberry Pi, but can be used on other machines running Linux such as Synology Nas and cloud deployments. Pi-Hole has the ability to block ads from traditional websites, as well as ads from unsafe locations, SmartTV traffic blocking and mobile ads.
Pi-Hole can be updated with third-party lists or the application’s own lists. Here I’ll show you how to install it in docker and get one of the most famous lists on the internet.
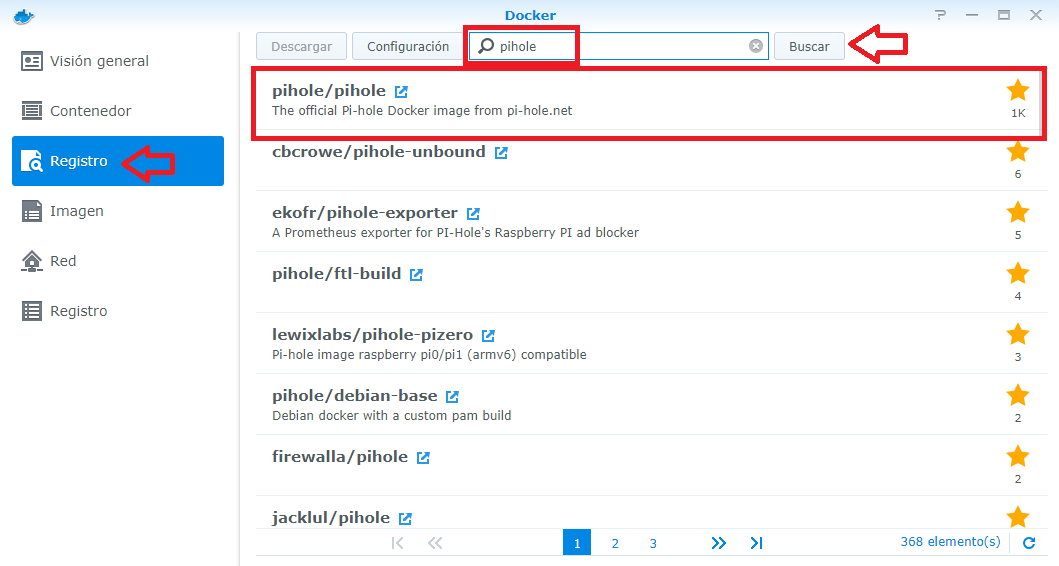
Open docker, go to registry and search for pi-hole. Double click to start downloading the image
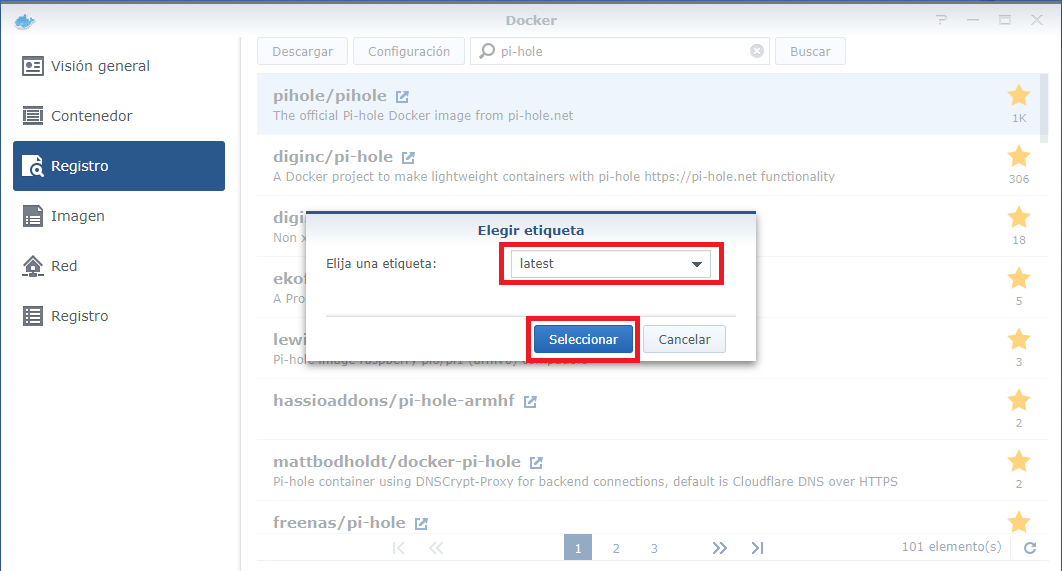
Choose latest and click on select
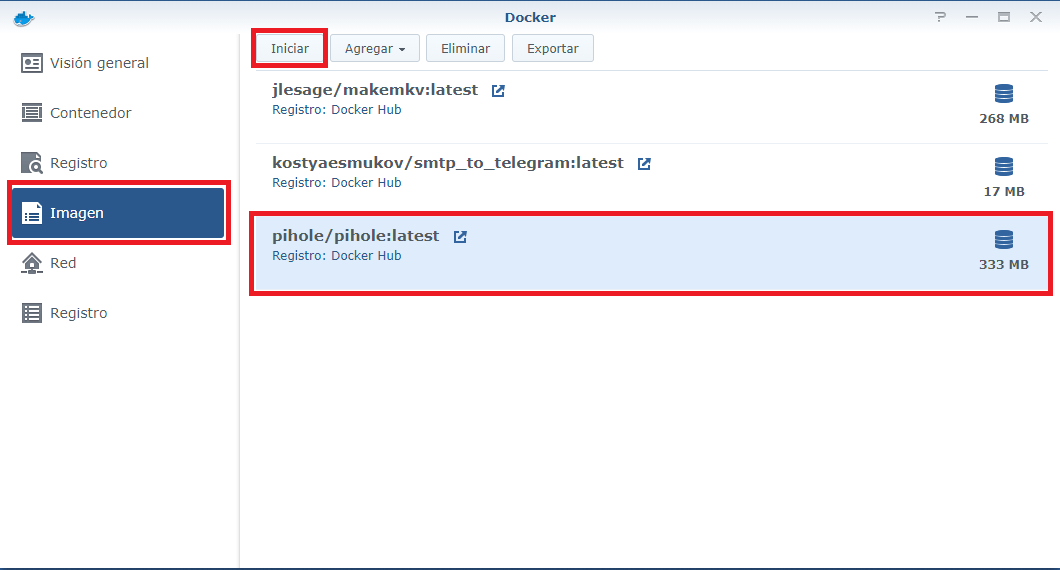
Go to image, select pi-hole and click start.
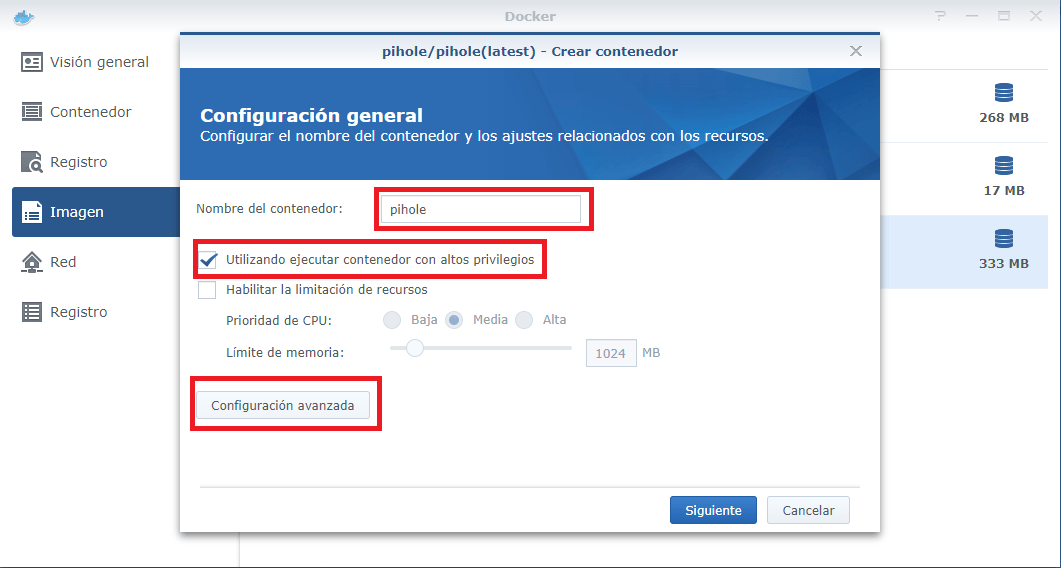
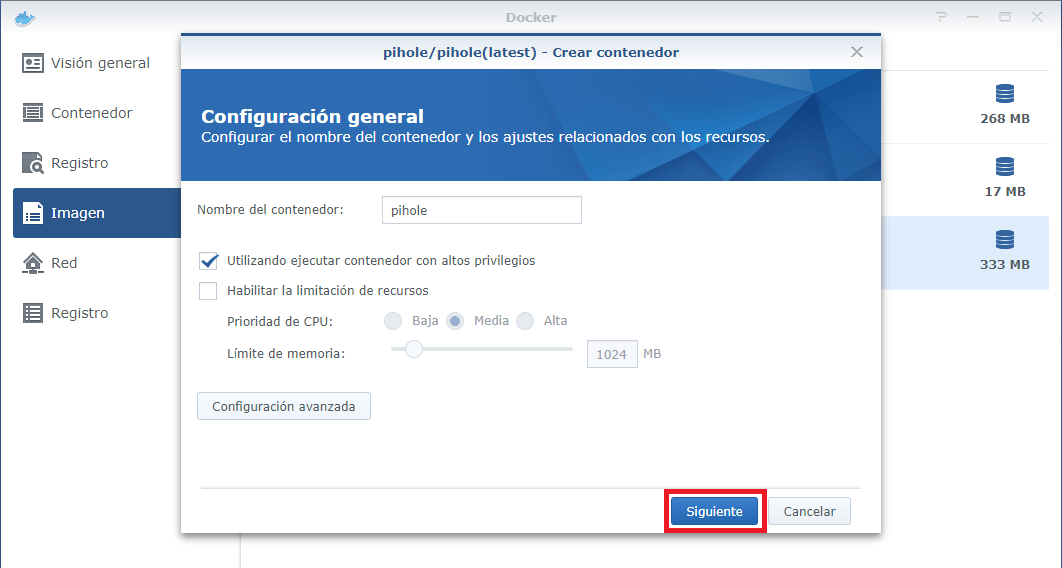
Choose a name for the container. Check the option to run with high privileges and click on advanced configuration.
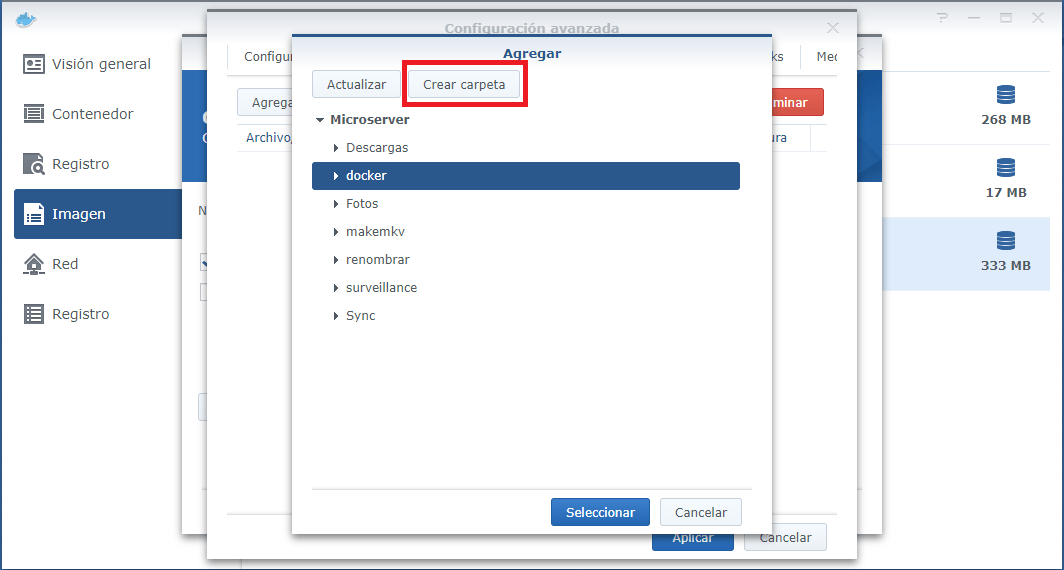
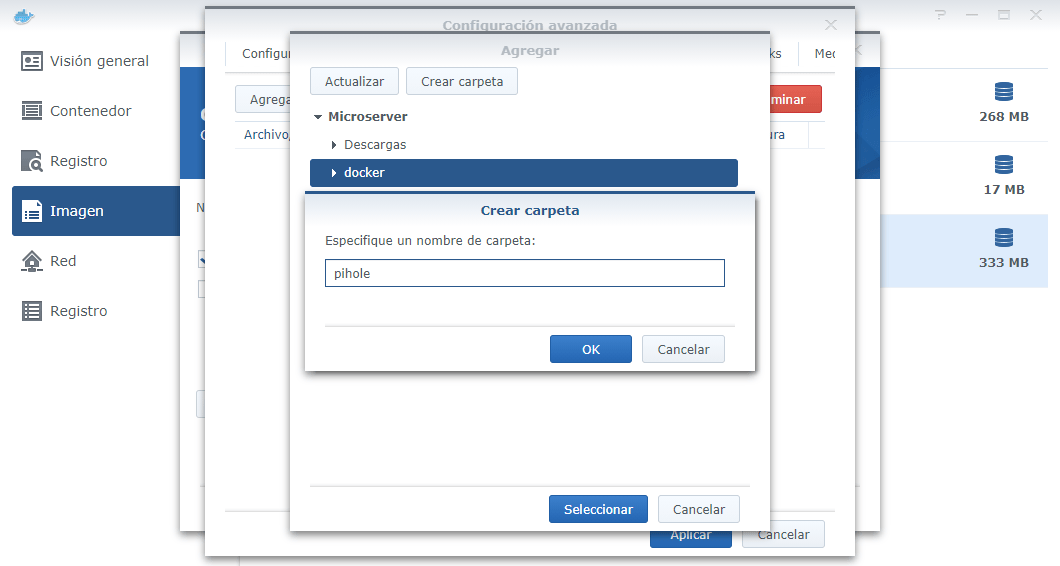
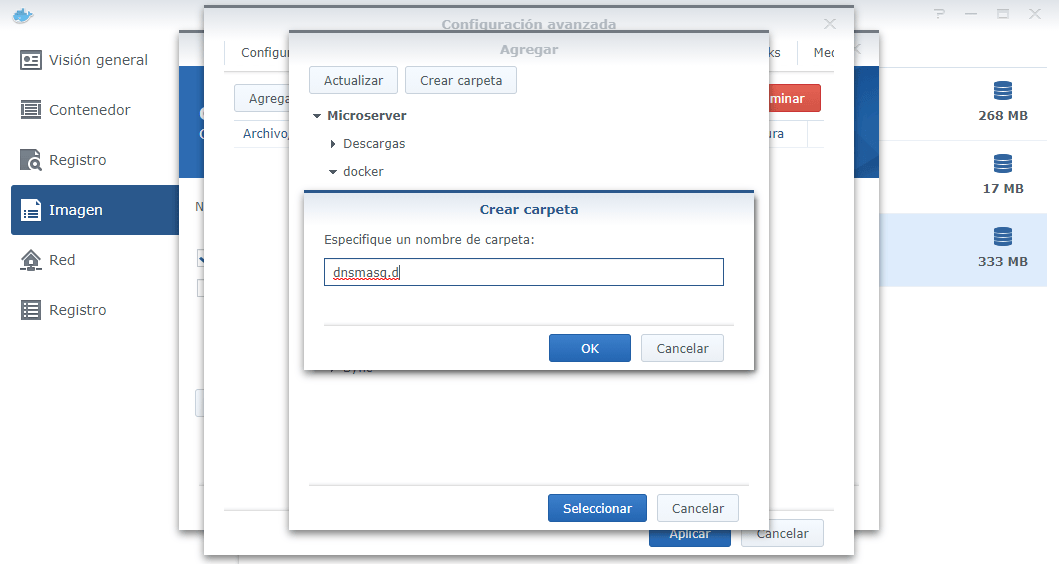
Inside the docker folder you have to create a folder called pihole and inside it two other folders called dnsmasq.d and pihole. We can do it from docker or from file station.
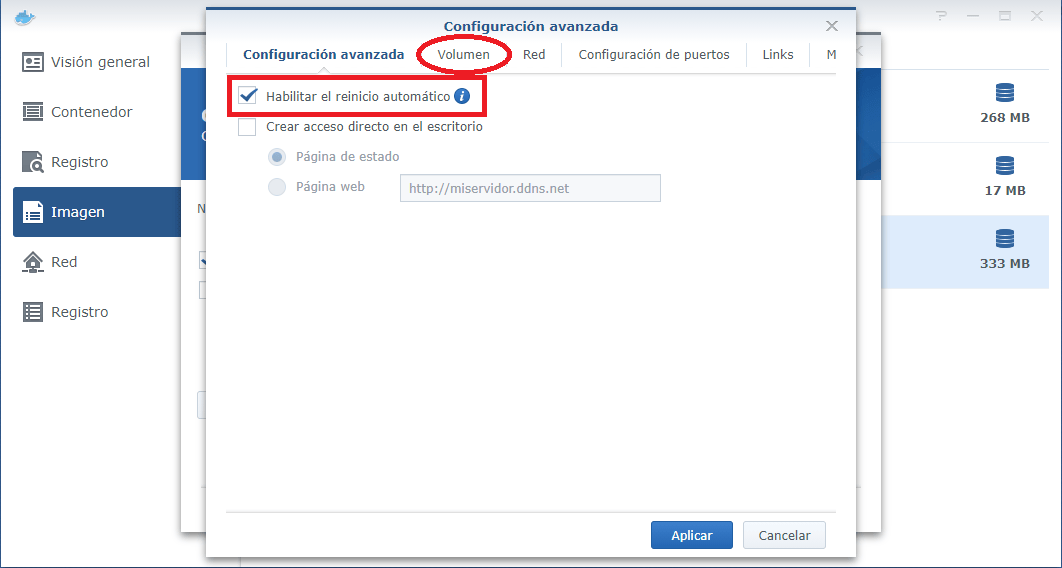
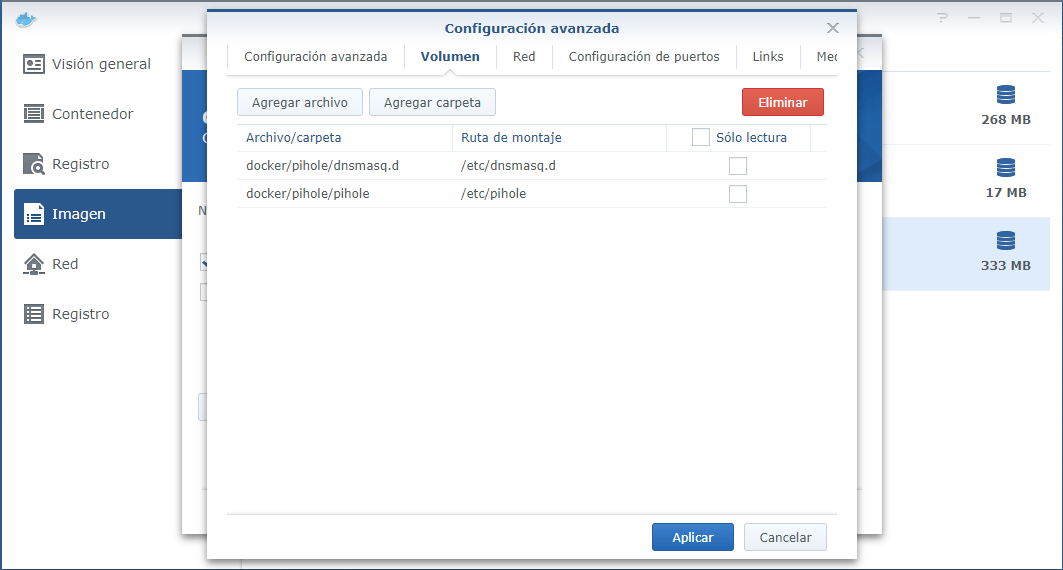
Enable the automatic restart and go to the volume tab.
Click on add folder and add the paths as shown in the image.
docker/pihole/pihole => /etc/pihole
docker/pihole/dnsmasq.d => /etc/dnsmasq.d
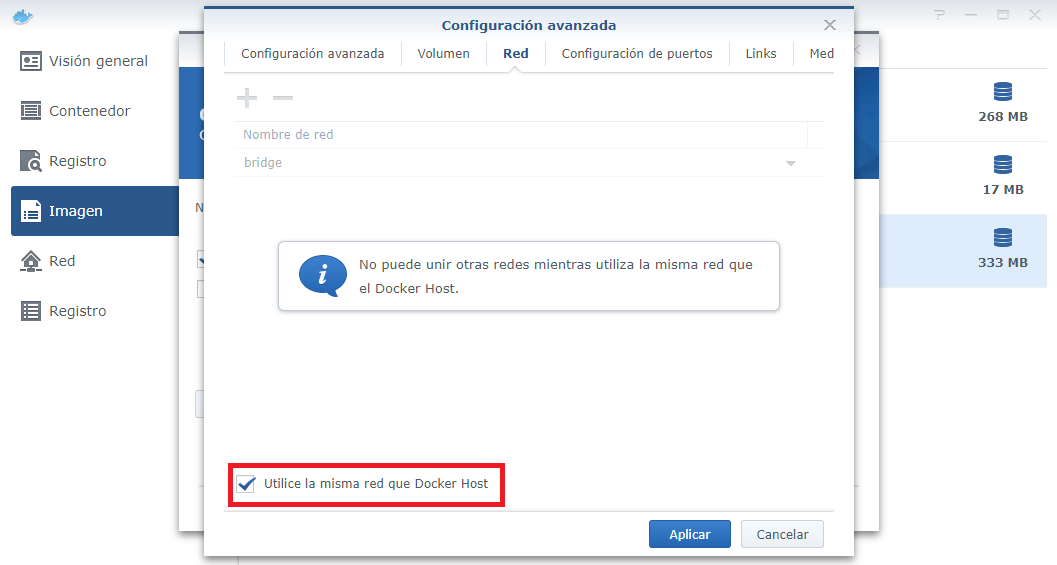
Go to the network tab and tick the option use same network as docker host
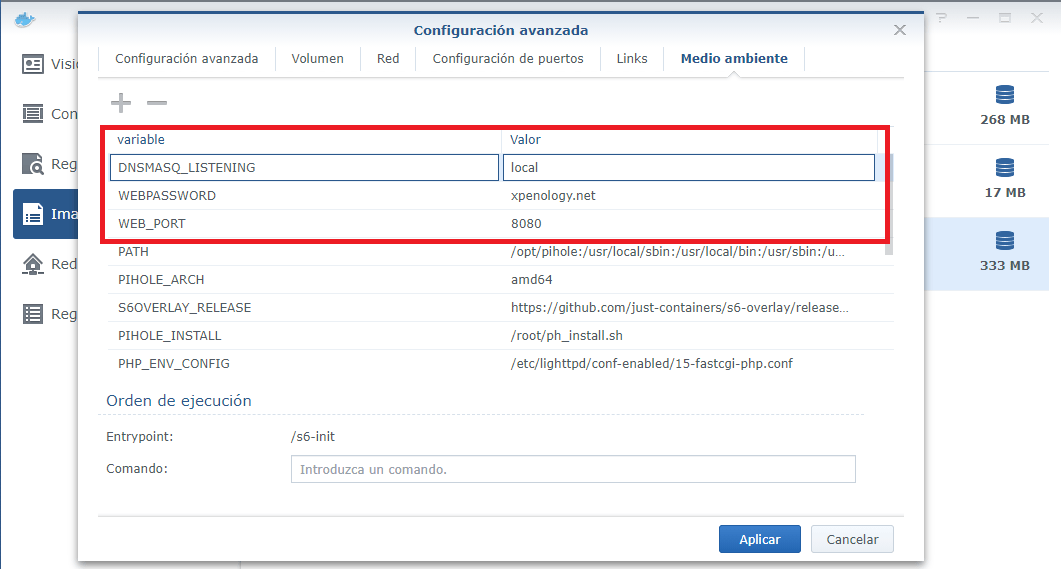
Finally, go to the environment tab, click on + and add these options
Variable: WEB_PORT – Valor: 8080 or 1010 or the port you want to use to access the web panel
Variable: WEBPASSWORD – Value: the password you want to use to access the web panel.
Variable: DNSMASQ_LISTENING – Value: local
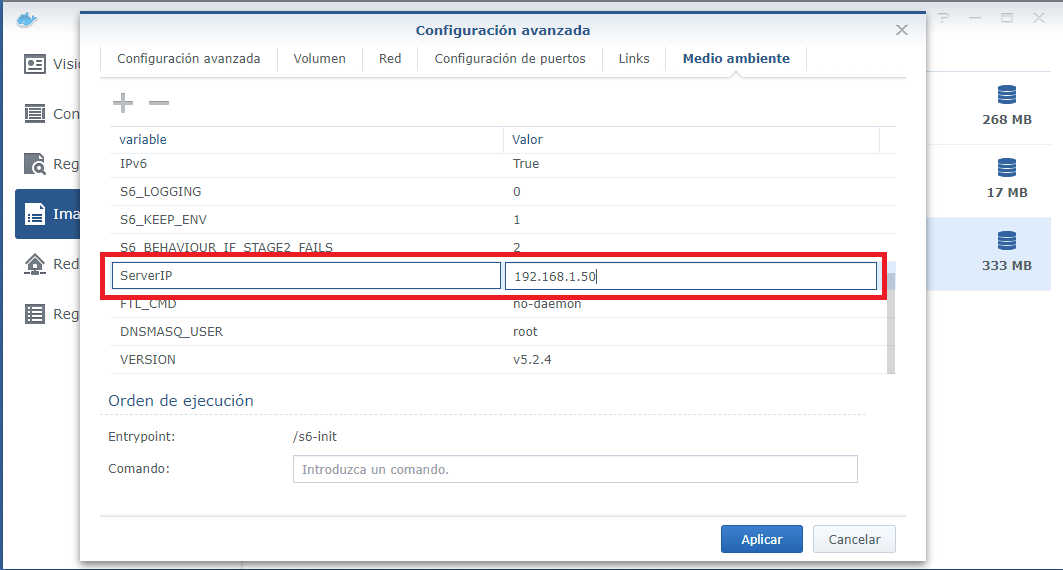
Go down and look for the option “server ip” and enter the address of our xpenology. Click on apply.
Next
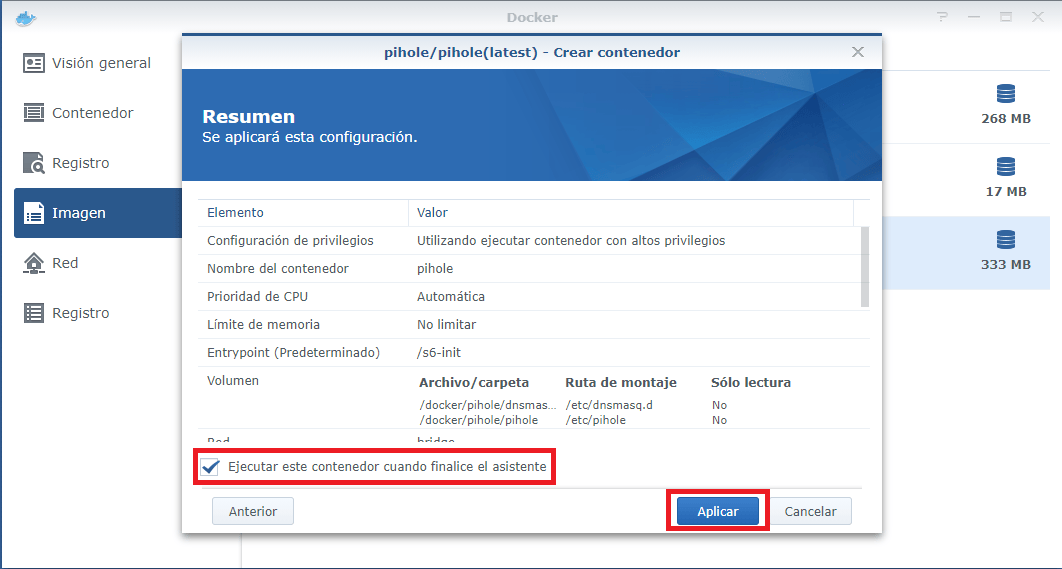
Select run this container when the wizard finishes and click on apply.
If you have followed all the steps correctly, go to container and you should see the image of pihole running.

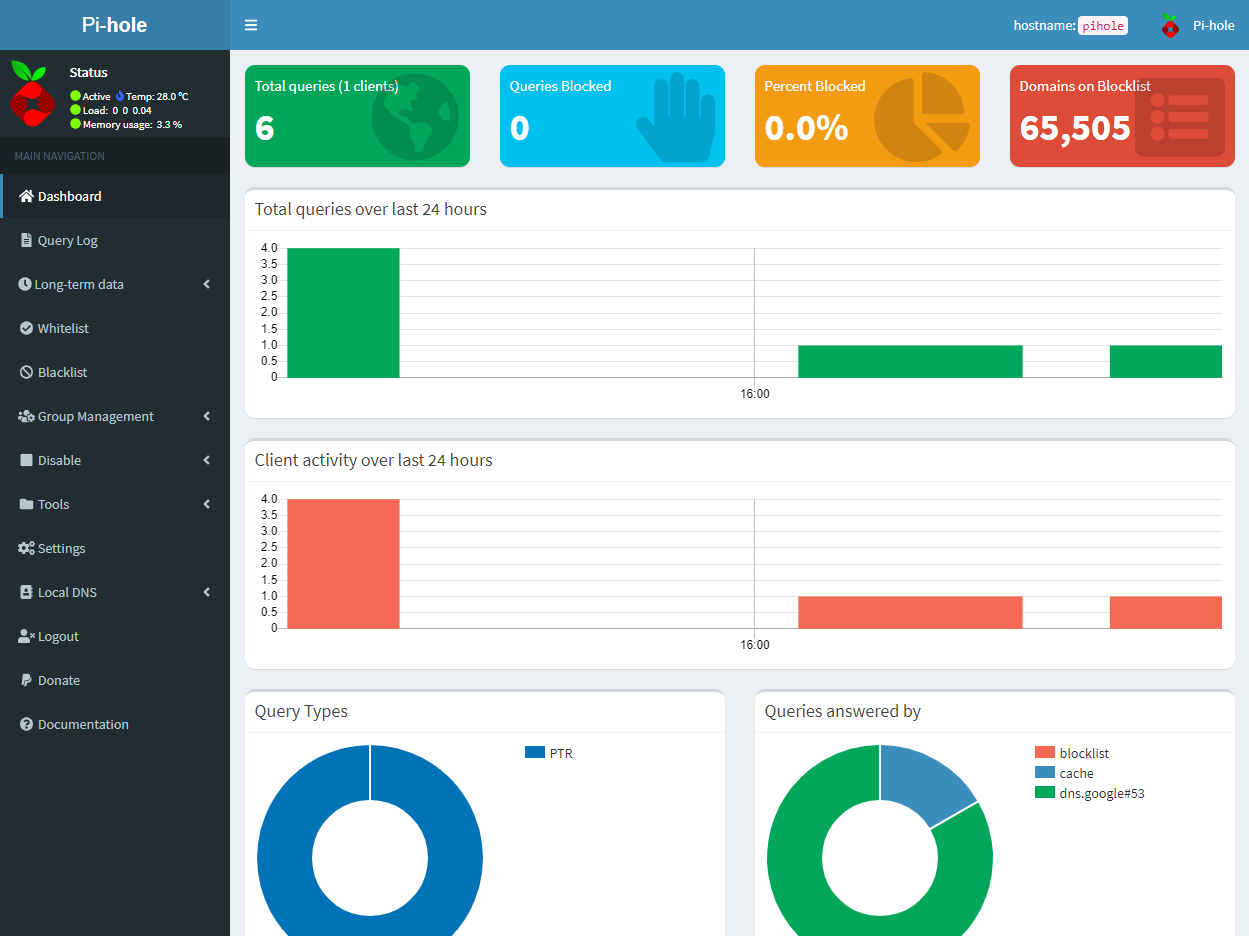
To test if Pi-Hole works we open our favourite browser and put http://ip-del-server:8080/admin/ and we will see the login window (port 8080 is the one chosen in this tutorial, if you have put another one, change it).
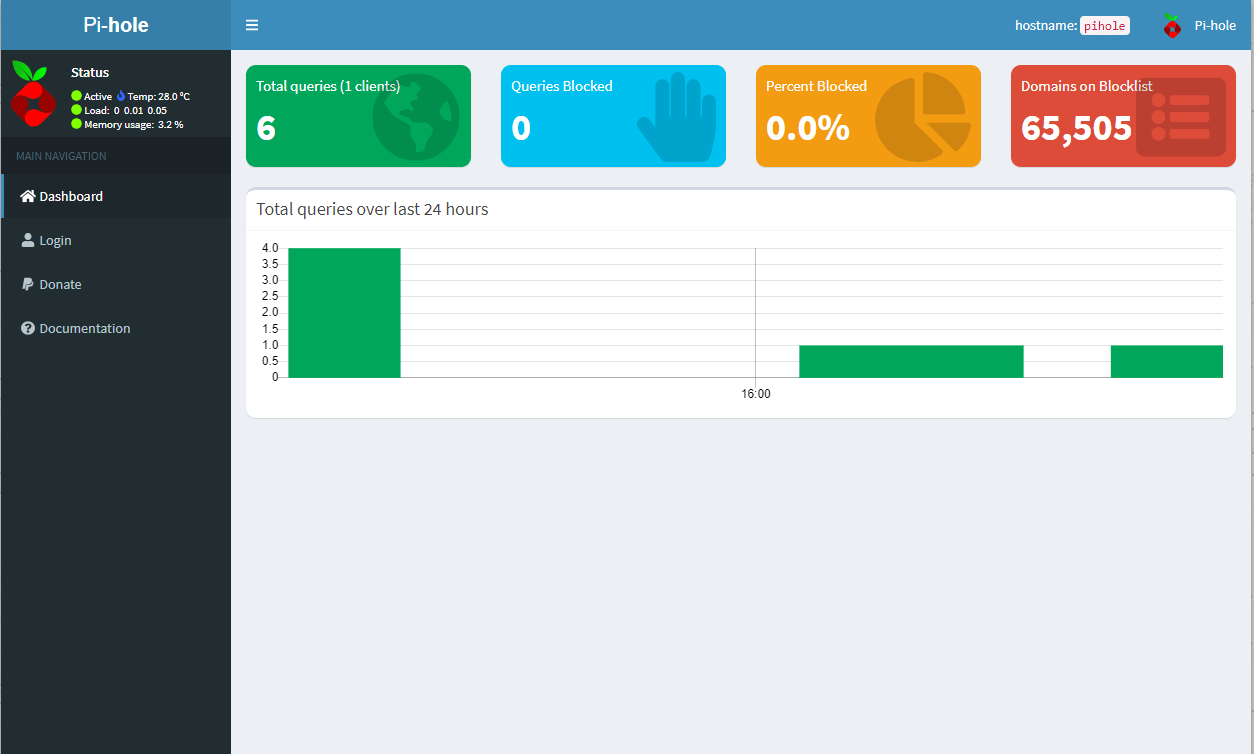
Once you have entered your password, you are in.