
A VPN (Virtual Private Network) is, to summarise and simplify a lot, a technology that allows us to connect several computers that are in different networks, as if they were in the same local network. Of course there is much more that could be said about this technology, its protocols and its advantages, but we are going to highlight 2.
- Security, as it will allow us to create an encrypted tunnel so that our information travels securely.
- Convenience, as it will allow us to manage our Xpenology and its services as if we were on the same local network, thus allowing us to reduce the number of open ports on our router, thus achieving another Plus in security
Requirements
The only requirement is to have a DDNS pointing to our network, as it will be necessary to tell the OpenVPN client where to point. It is true that if our network has a fixed public IP it is no longer a requirement, although it is still highly recommended, for many reasons, from making sure that the connection is still possible if for any reason our operator changes our IP, because it is always easier to share and remember a domain created by ourselves than an ip address …..
Server configuration
- To start, go to the DSM package centre and install VPN server. When we open it, we will choose OpenVPN from the left menu, choose the OpenVPN option and the next thing to do is to enable OpenVPN server.
In this case the configuration is quite plug and play, so we don’t need to touch much to make it work from the first block, maybe the number of connections and connections from the same account, but that depends on how we are going to use it and how many clients we expect to connect simultaneously.
As for the port, the default port used by OpenVPN is 1194 UDP, although as with most services that use default ports, it would be advisable to change it. In any case, this port must be open in your router for the service to work.
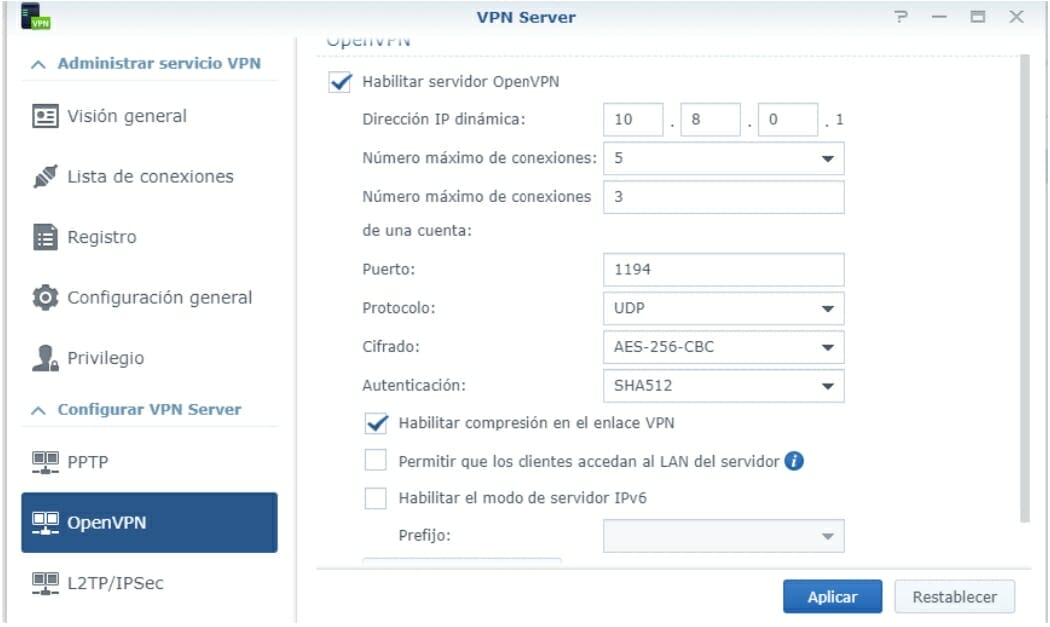
Finally, scroll to the bottom and click on export configuration. This will download a zip file containing the VPNconfig.ovpn file needed to run the clients that will connect to our VPN.
- We will open the file with any text editor and make only 2 changes.
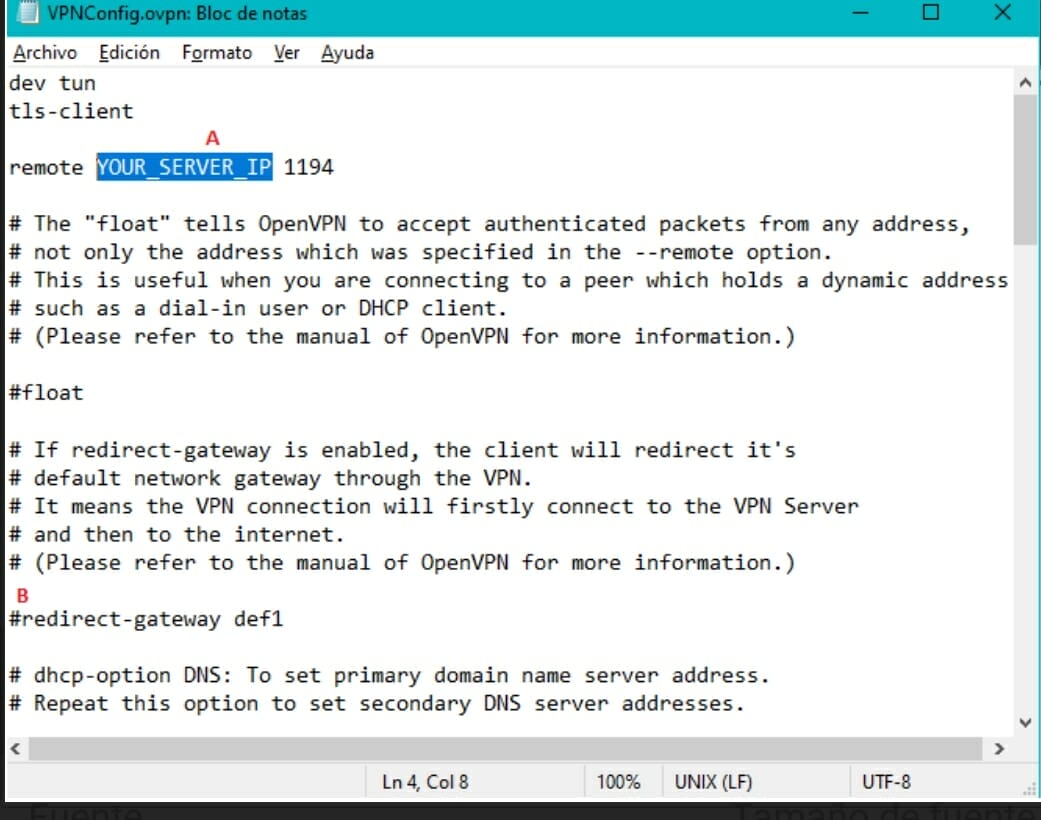
In the first place, we will change the text that appears highlighted in the image for the DDNS address that we have configured in our NAS and that, therefore, points to our public ip. Here we will only write the address elnomredenuestrnas.ddns.net or whatever, since the port we have configured already appears below. Logically, if we decide to modify this port in the configuration of our NAS, we will also have to modify it in our configuration file, either editing it by hand as we do now, or generating a new one in the export configuration button.
The second change is just to delete the # symbol at the end of the second paragraph, just before redirect-gateway def1. Once this is done, save the changes and you will have this file at hand to configure the clients.
Android client:
- Setting up the Android client is really simple and starts by installing the official OpenVPN client for Android at this link:
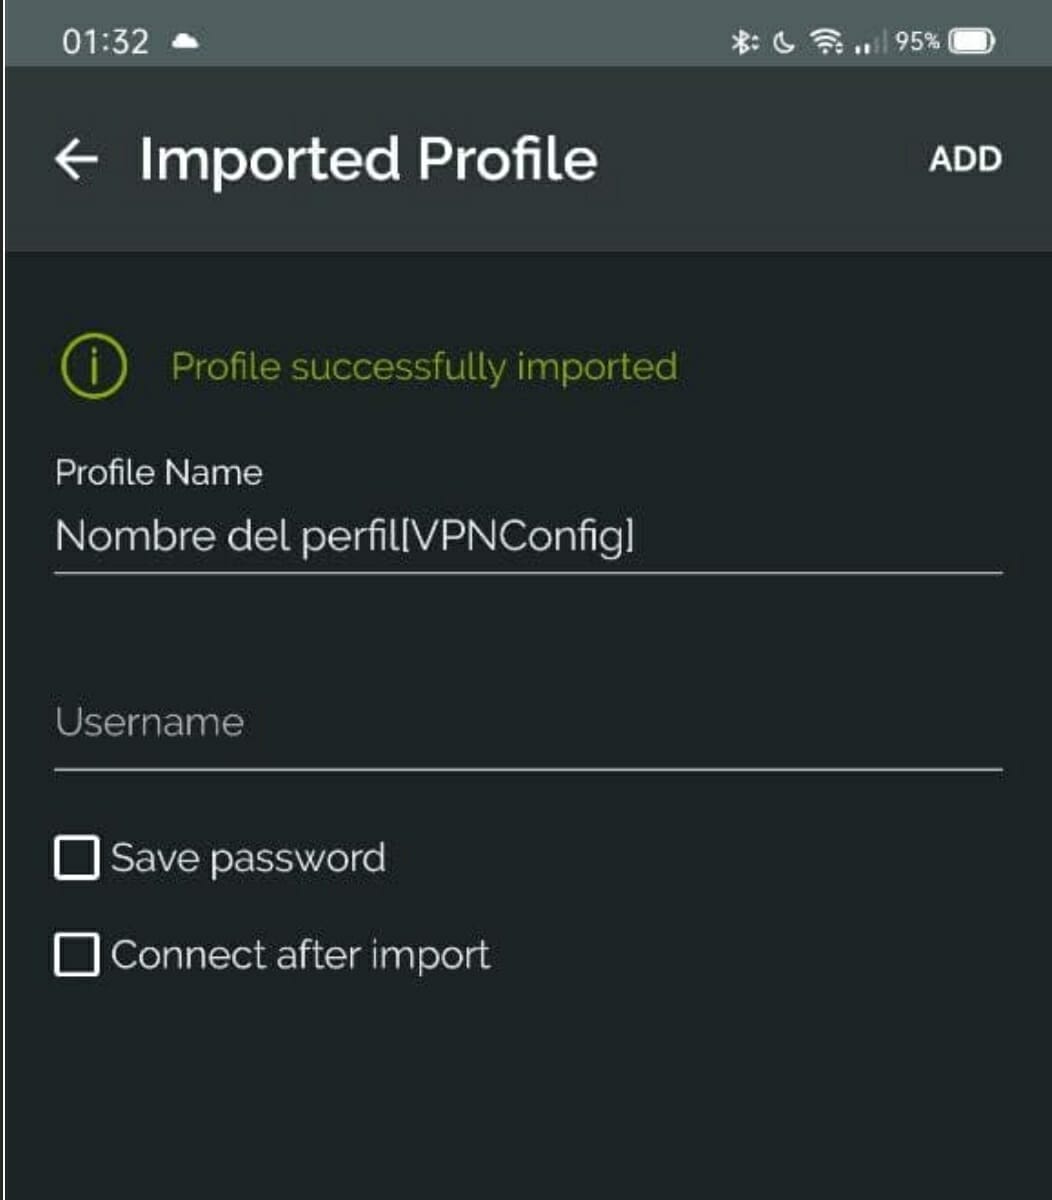
- Once installed, open it, accept the terms of use and leave it in the background while we open the VPNconfig.ovpn file that we edited in the previous point. Android will ask us which application we want to open it with, choose OpenVPN and it will take us to the client, which will ask us if we want to import the profile, taking us to the screen shown in the image.
- In this screen we will only have to enter the user name with which we are going to connect, as well as decide whether we will have to enter the password on each connection (not marking anything on this screen), or checking the box know password and entering our password only this time. Once this step is finished, just click on the ADD button in the top left corner and the client will be ready to connect to our VPN.
Windows client:
Configuration on Windows is on par with Android in terms of simplicity.
- We will start by going to the official OpenVPN website to download the version of openVPN GUI that corresponds to your pc and after downloading it, install it.
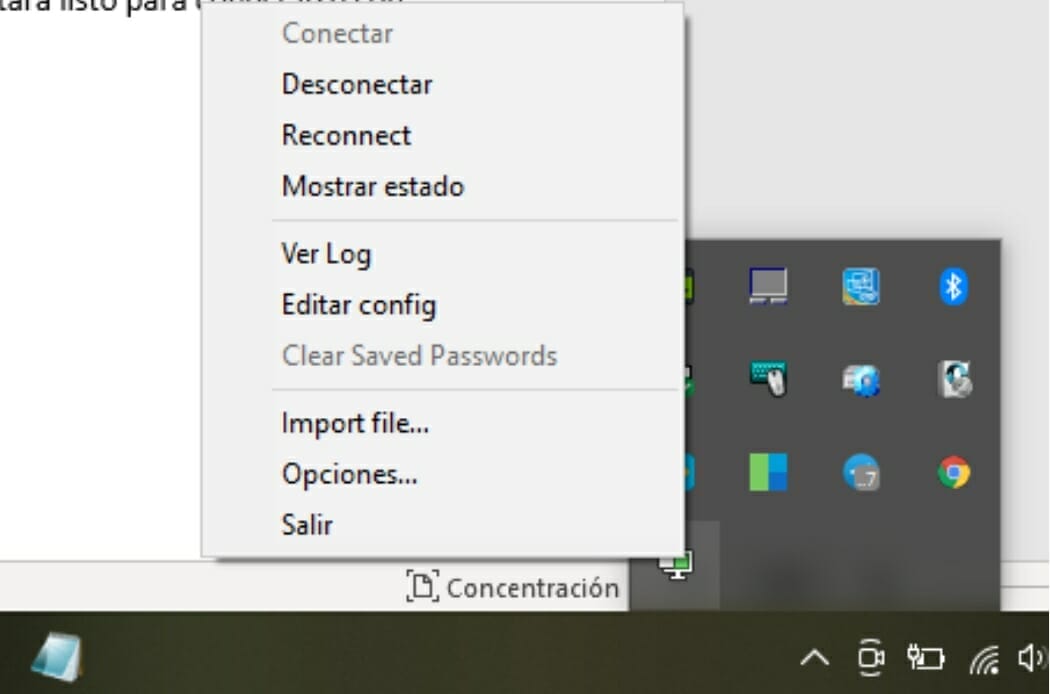
- Once it is installed, search for it, run it as administrator and go to the Windows taskbar to find the icon shown in the image.
Here we have 2 options. On the one hand we can have copied our famous configuration file into the config folder in the openVPN GUI directory and then we just need to right click on the icon in the taskbar and click Connect to access the login screen.
- If you don’t want to complicate looking for the folder, just choose import by right clicking on the icon and use the browser window that will open to search for the path where you have saved the config file. After this, double click again and that’s it, you only need to enter your account details and connect.
By replicating these steps it should be easy to connect as many Android/Windows devices as you want to your OpenVPN. If you have followed the steps and still have problems connecting, you can always check the steps, Google and the Xpenology Telegram group (in that order).