
WireGuard is a VPN client-server that is easy to install and configure, fast and modern, as it incorporates the latest cryptographic algorithms to provide the highest possible security for communications. According to its developers, it is faster and simpler than any IPSec tunnel and also without having to rack our brains with its complicated configurations. With respect to OpenVPN, it provides better performance due to the latest generation algorithms it uses.
In this guide we are going to learn how to configure wireguard on our server, mobile and windows. The first thing is to thank @SirNoish for making me a guinea pig and then download the package corresponding to our boot version.
For boot 1.03 we will use the “bromolow” version by downloading it from HERE
For boot 1.04 we will use the “apollolake” version by downloading it from HERE
Before starting, UDP port 51820 must be opened for external access.
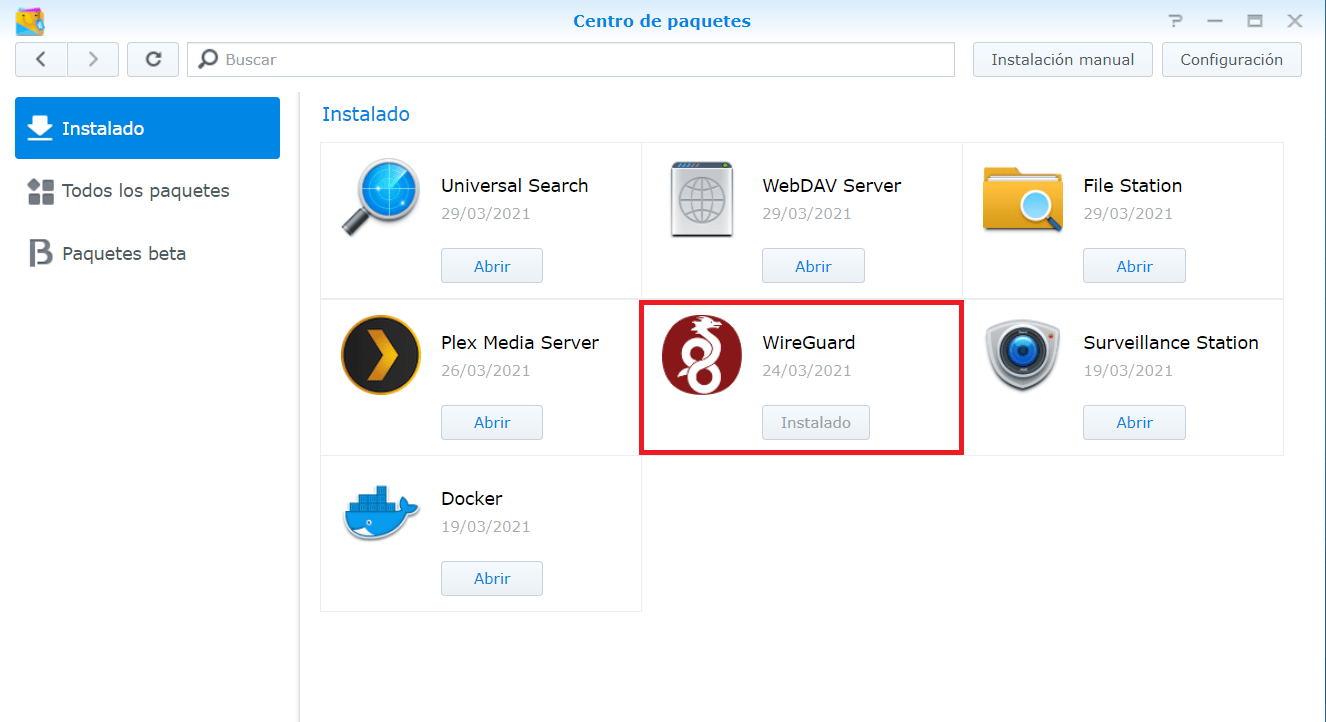
The installation is done like any other package, in the package centre, manual installation… Once installed, it should appear in the package centre like this
We’ve got the easy part, now let’s get to the hard part. You need a client installed on windows, android, linux or mac. For the guide we are going to use windows.
We go to the official wireguard website and download the version that we are going to use at https://www.wireguard.com/install/
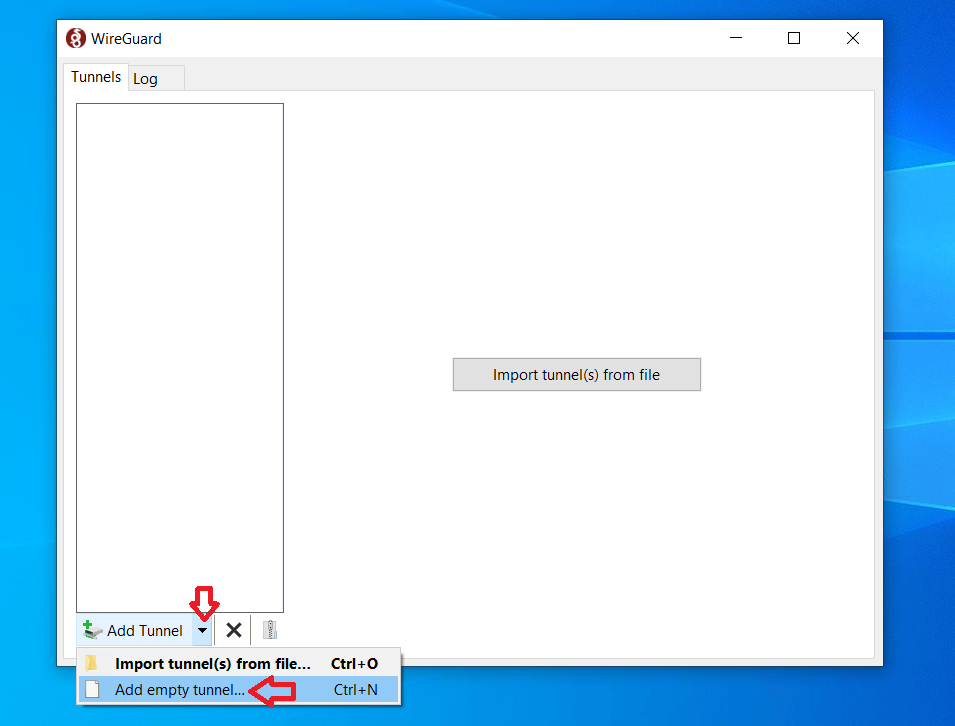
Once installed on our pc, we open it, go to “add tunnel” and “add empty tunnel”.
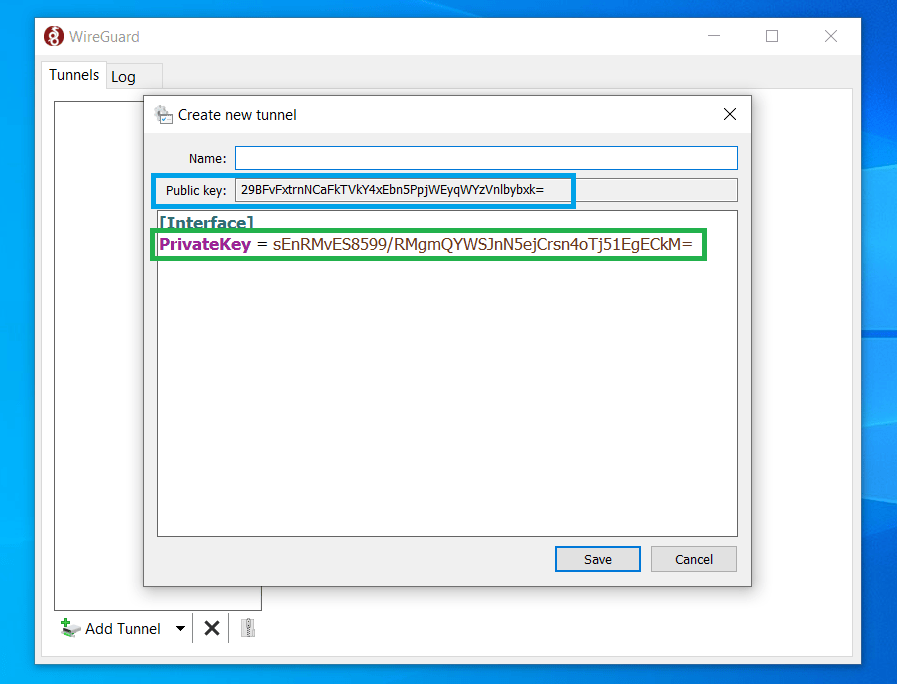
A new window opens with the necessary data to create the server. IS VERY IMPORTANT not to lose them in case we want to add clients over time. In the image you can see the public key and the private key. Write them down where they will not be lost.
** These are just a guide to make the tutorial easier. Do NOT use these keys for your safety.
PUBLIC KEY = 29BFvFxtrnNCaFkTVkY4xEbn5PpjWEyqWYzVnlbybxk=
PRIVATE KEY = sEnRMvES8599/RMgmQYWSJnN5ejCrsn4oTj51EgECkM=
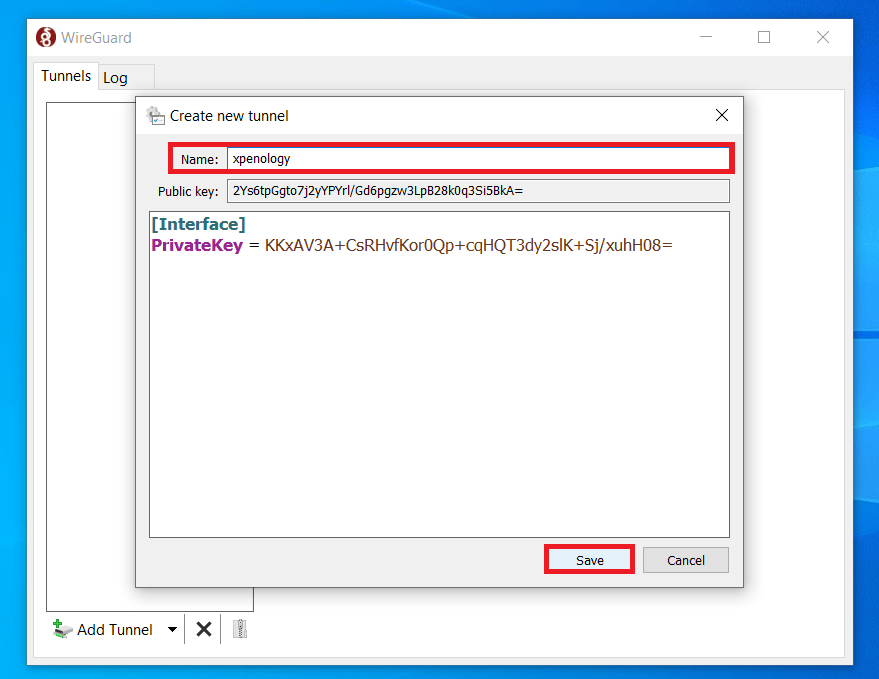
Once we have made the points, we close the tunnel and click again to generate a new tunnel. We put the name we want to the connection and save it.
Now we connect to our xpenology via ssh and create the following folder
sudo mkdir /etc/wireguard

accedemos a la carpeta
cd /etc/wireguard

In this step, everyone can choose the editor they prefer, whether it is nano, vim, … I will use vim because it is the default on the server. We create the configuration file
sudo vi wg0.conf
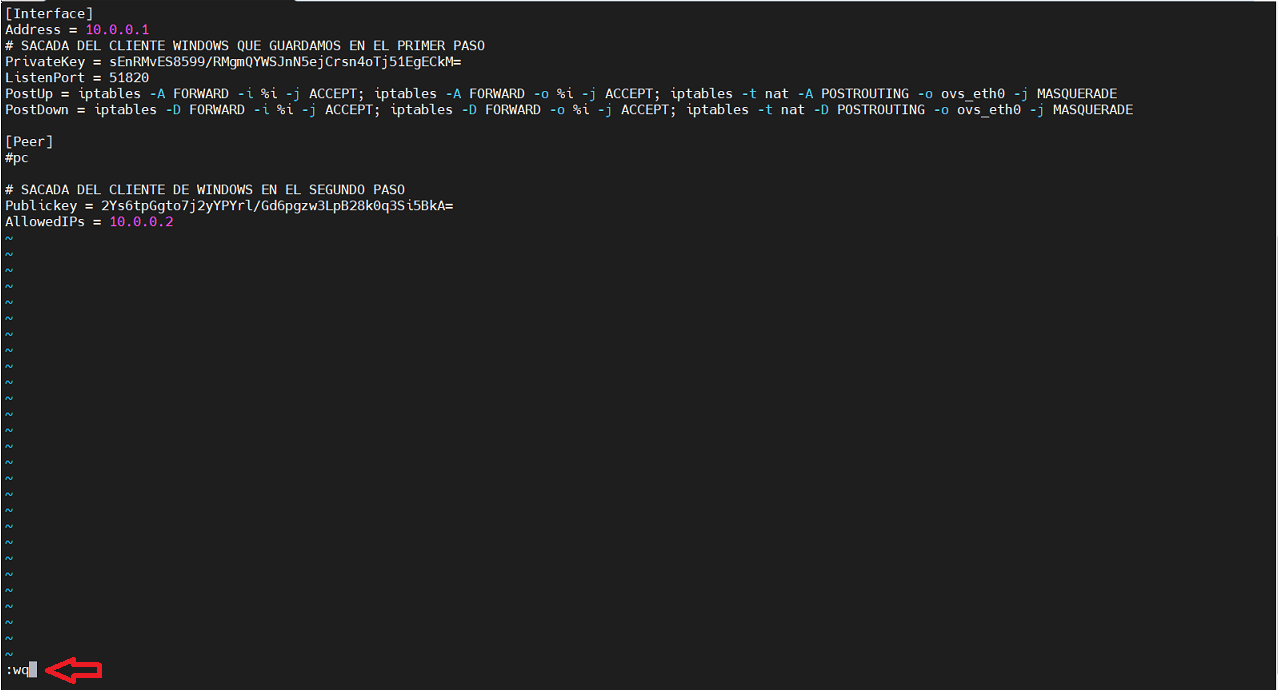
A text box opens in which you have to press the INSERT key to be able to write. Paste the minimum and basic configuration
[Interface]
Address = 10.0.0.1
# TAKEN FROM THE WINDOWS CLIENT THAT WE SAVED IN THE FIRST STEP
PrivateKey = sEnRMvES8599/RMgmQYWSJnN5ejCrsn4oTj51EgECkM=
ListenPort = 51820
PostUp = iptables -A FORWARD -i %i -j ACCEPT; iptables -A FORWARD -o %i -j ACCEPT; iptables -t nat -A POSTROUTING -o ovs_eth0 -j MASQUERADE
PostDown = iptables -D FORWARD -i %i -j ACCEPT; iptables -D FORWARD -o %i -j ACCEPT; iptables -t nat -D POSTROUTING -o ovs_eth0 -j MASQUERADE
[Peer]
#pc
# TAKEN FROM THE WINDOWS CLIENT IN THE SECOND STEP
Publickey = 2Ys6tpGgto7j2yYPYrl/Gd6pgzw3LpB28k0q3Si5BkA=
AllowedIPs = 10.0.0.2

To save the file, press ESC and type anywhere on the screen :wq
IMPORTANT
The red box (ovs_eth0) is the name of your connection. I have not yet found any case in xpenology that is not called like that, but to check it you just have to ssh ip a and it will show the name. If in your case it is another name, modify it and save it.

This is the end of the server side configuration. Now we go back to the windows client and do the configuration. Click on edit and complete
[Interface]
PrivateKey = KKxAV3A+CsRHvfKor0Qp+cqHQT3dy2slK+Sj/xuhH08=
Address = 10.0.0.2/32
DNS = 1.1.1.1
[Peer]
# TAKEN FROM THE WINDOWS CLIENT THAT WE SAVED IN THE FIRST STEP
PublicKey = 29BFvFxtrnNCaFkTVkY4xEbn5PpjWEyqWYzVnlbybxk=
AllowedIPs = 0.0.0.0/0
Endpoint = tu.ddns.net:51820
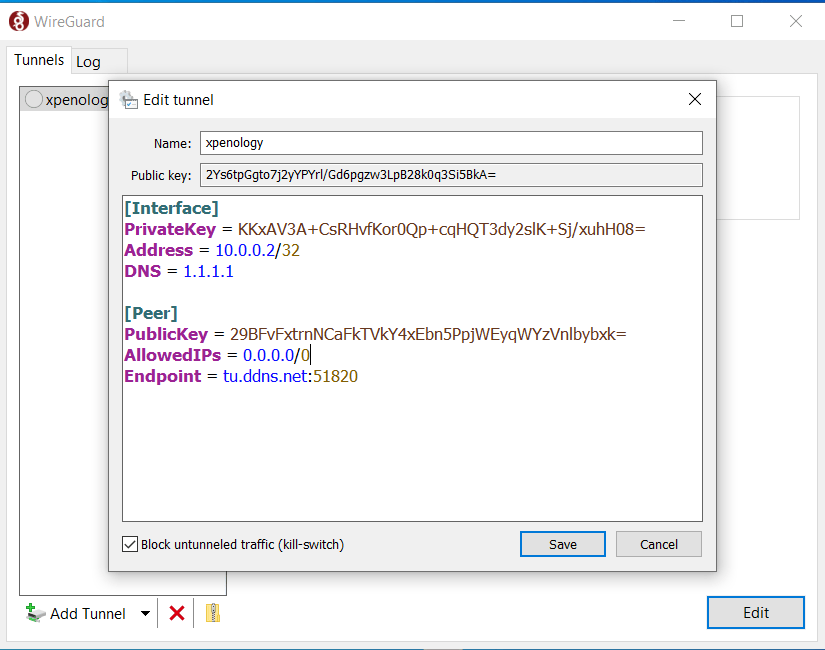
Save and return to the server via ssh. Send this command
sudo sysctl -w net.ipv4.ip_forward=1

And that’s it. We just need to launch the connection and do the test. By ssh we launch the following command. If everything went as described in the tutorial you should see an image like the following one.
sudo wg-quick up wg0

We go back to the windows client. Click on activate and it will connect to the server.
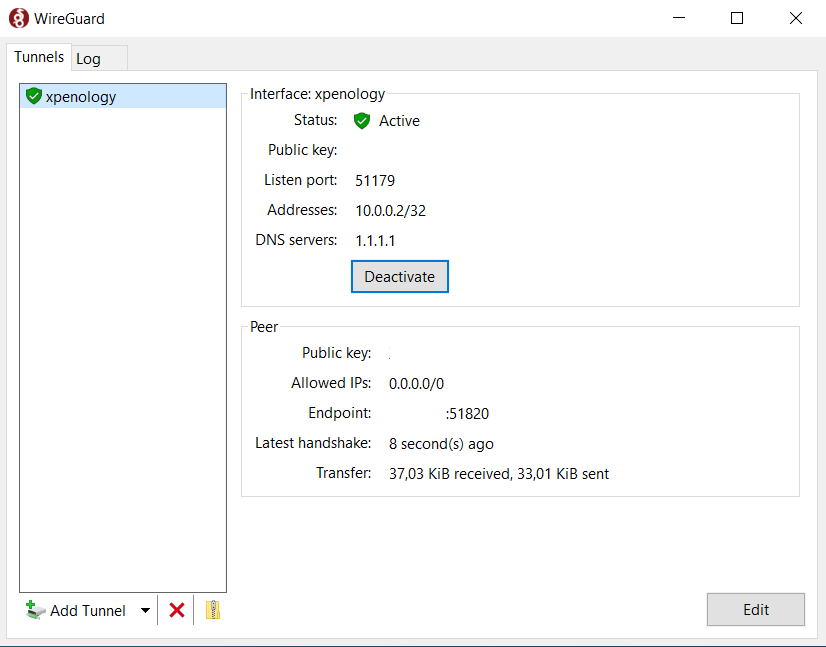
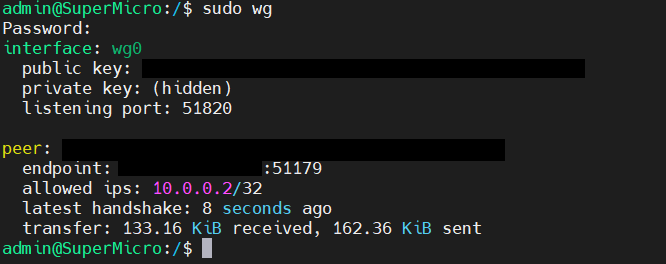
We check via ssh that it works
sudo wg
To top it all off, we’re going to create a triggered task to start wireguard every time you turn on the server.
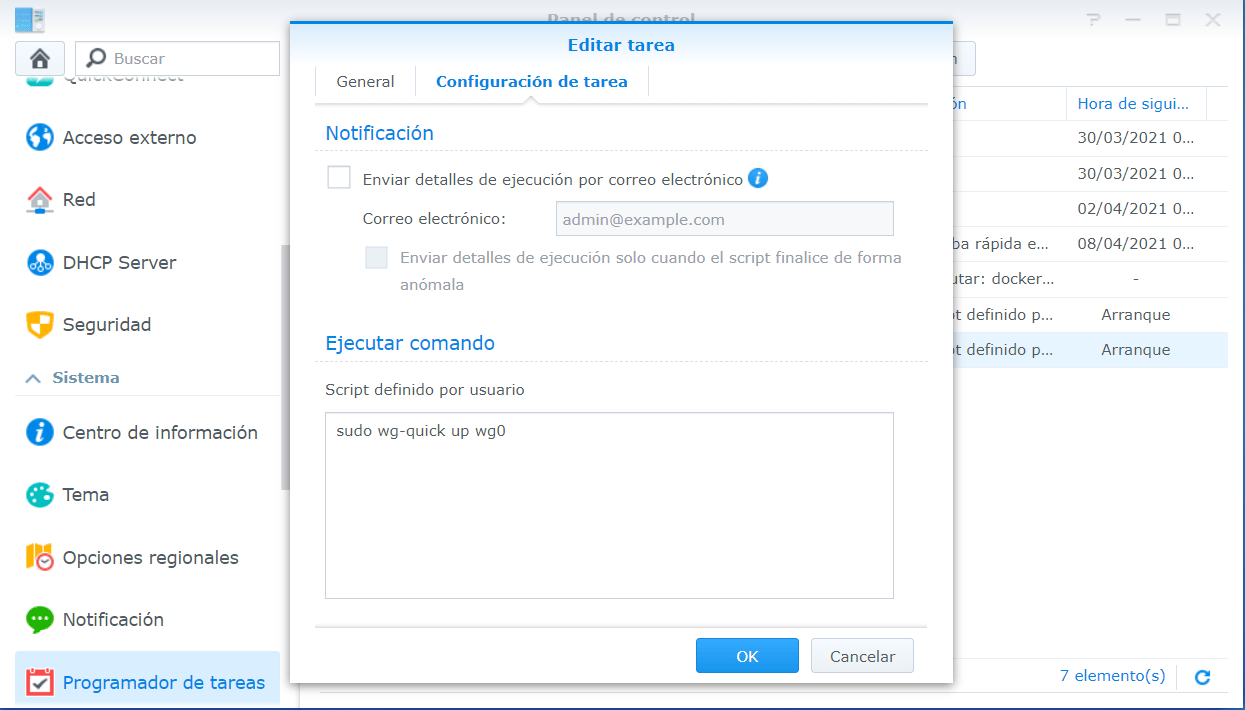
In the next post we will learn how to create the connection with an android mobile.

