
Tutorial for the installation of Xpenology. Valid for installing DSM from 0 or upgrading from previous versions.
In this post we are going to create an installation of another of the most used NAS systems. It is an emulation of Synology’s DSM system, so I recommend that if you like the system after trying it, buy an original Synology.
For the creation of the boot media that emulates DSM we will need a usb stick (no matter the size). From the usb stick we need to know the PID and the VID, for this we put the usb stick in a usb port and follow the following steps
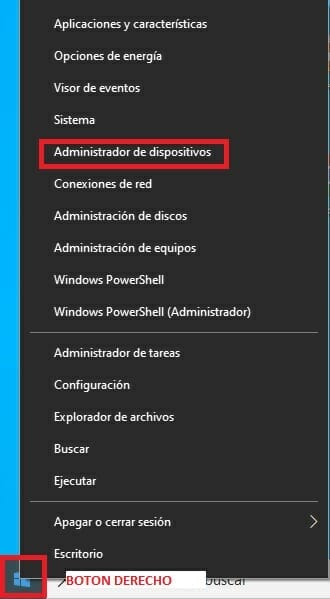
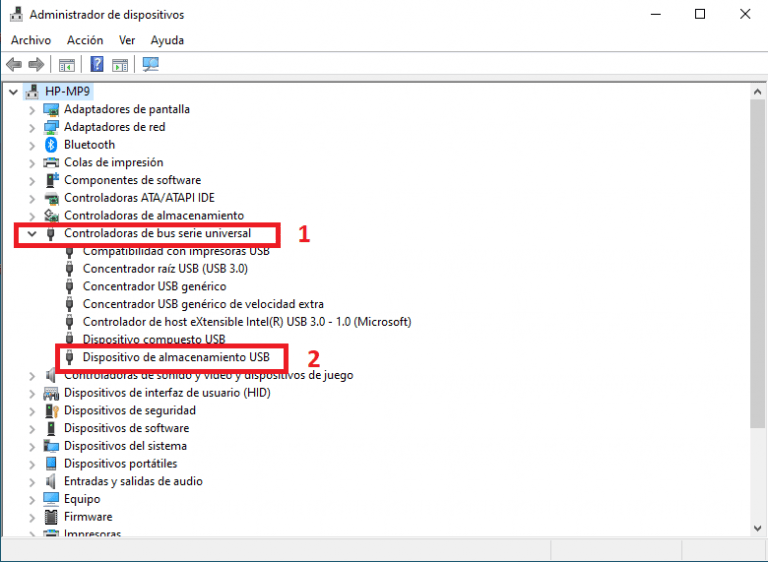
Once in the device manager, look for the USB memory stick to extract the data.
Double click on the device, in the window that opens we go to “DETAILS” and in property we choose “Hardware ID”.
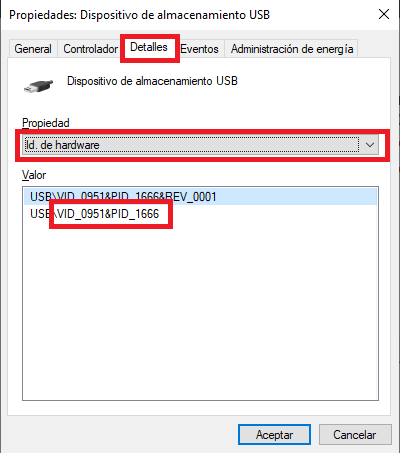
We already have the VID and the PID, so we will need it later on.
Now we download the XPEnology image. Depending on your hardware you will have to choose one version or another.
For equipment prior to Intel Haswell we download version 1.03 or if your equipment is Haswell or higher we download version 1.04. In both cases the procedure is the same, we download the zip file and unzip it in a folder.
In this step you have to download a couple of programs that are essential to create the memory. They are OSFMount and Win32DiskImager. Install both programs on your computer and run OSFMount.
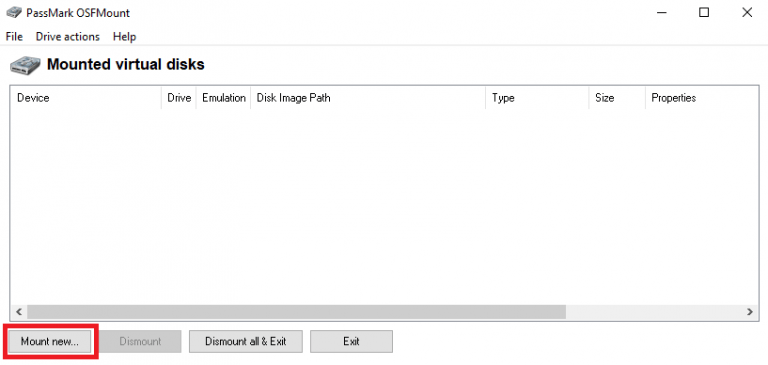
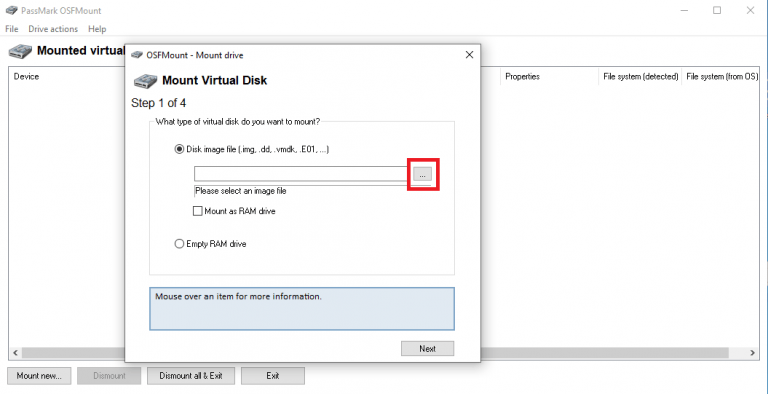
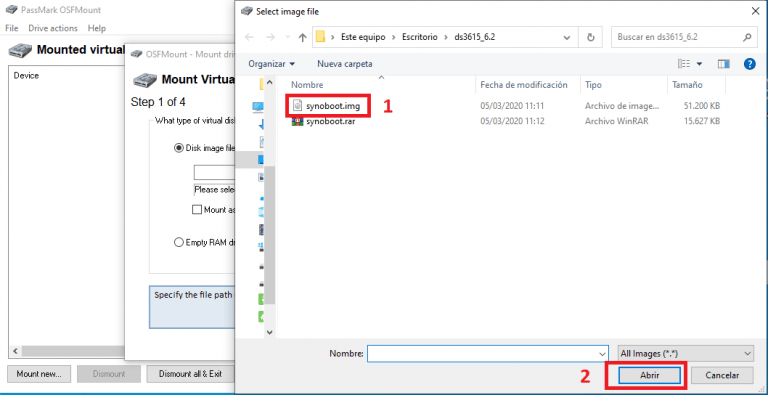
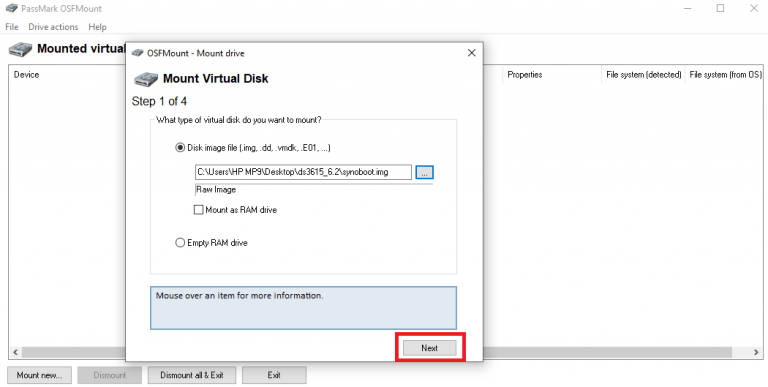
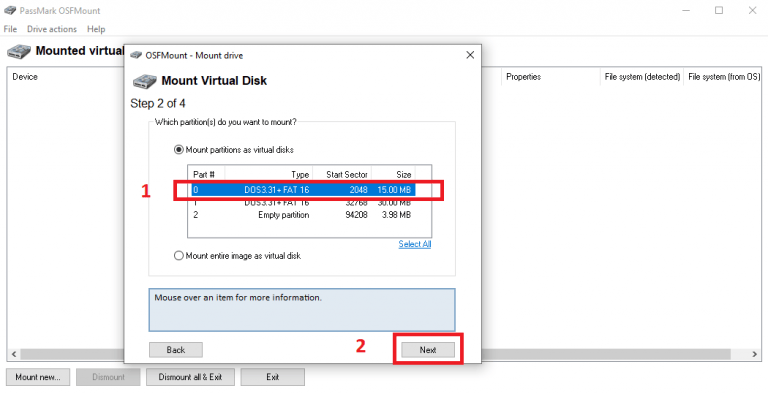
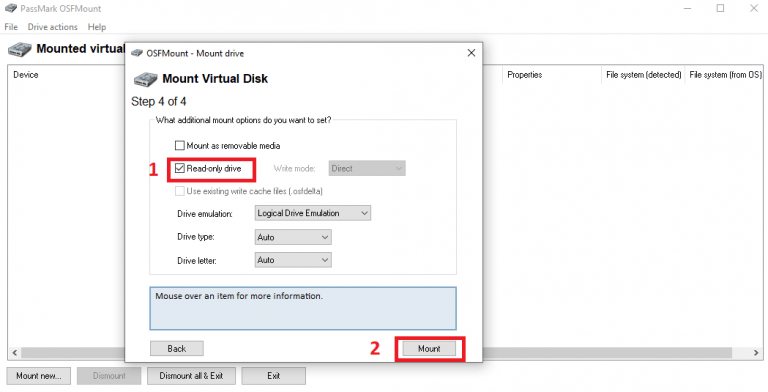
Uncheck the Read-only drive option and click on mount.
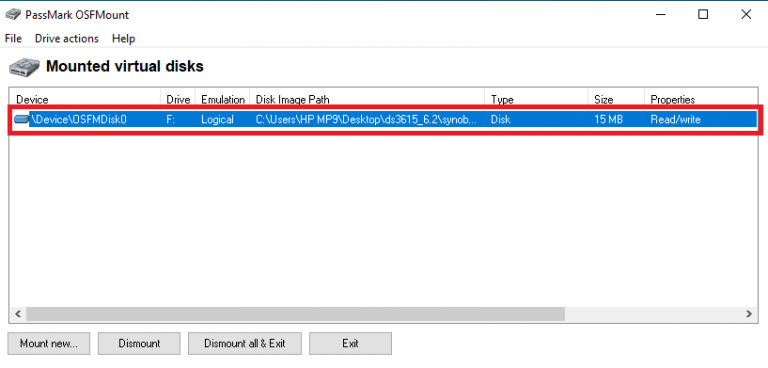
Double click on the mounted image and a file explorer opens. Go to the “GRUB” folder and edit the file “GRUB.CFG”. To edit this type of file it is recommended to Notepad++ for its versatility.
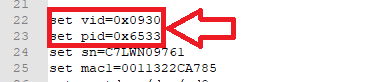
Inside the file we must look for the lines to be modified. In this case we would change vid=0x0951 and pid=0x1666
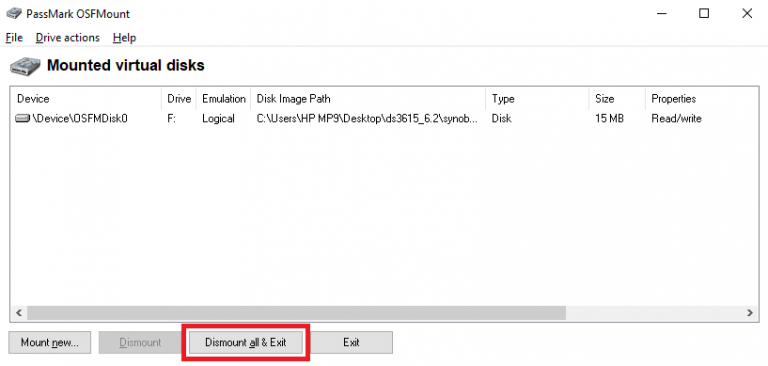
Save and exit Notepad++. Close the file explorer and in OFSMount click on Dismount all & exit.
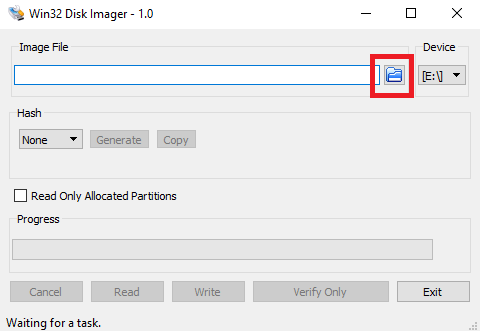
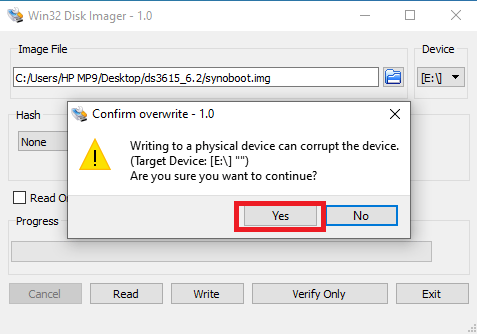
We open Win32DiskImager to save the image we have just modified as follows
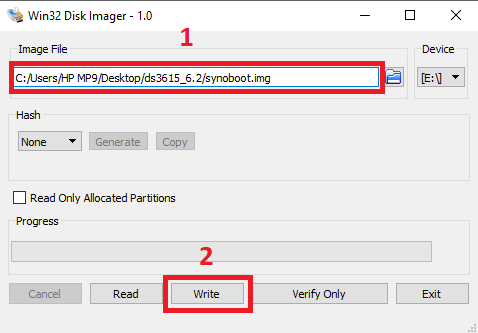
With this we would have our unit ready to boot what will be our NAS. It should be noted that the equipment must be configured to boot from USB. For the first boot it is recommended to at least have the monitor connected to know if the process has been done correctly or not. NOTE THAT THE NAS MUST ALWAYS HAVE A NETWORK CABLE CONNECTED TO !!!!!!.
If all has gone well, you will see a screen like this one
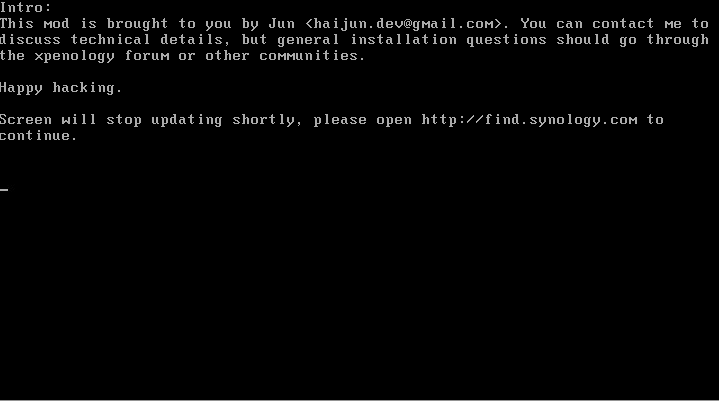
If you have reached this point go to your pc, open your browser and type in find.synology.com and after a few moments we will have our nas on the screen.
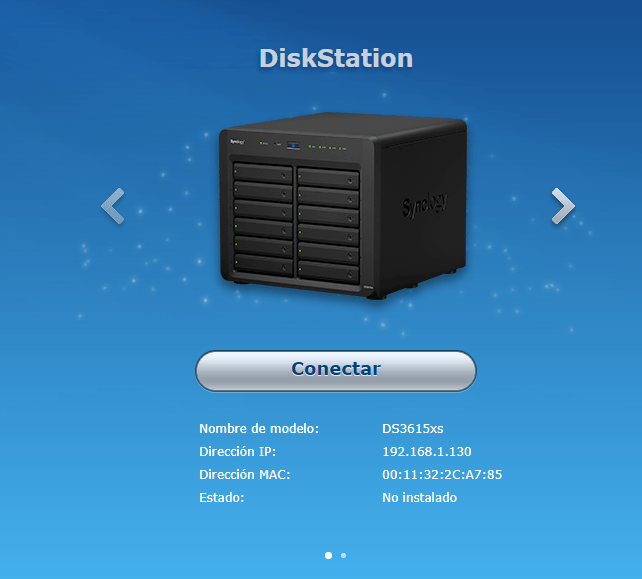
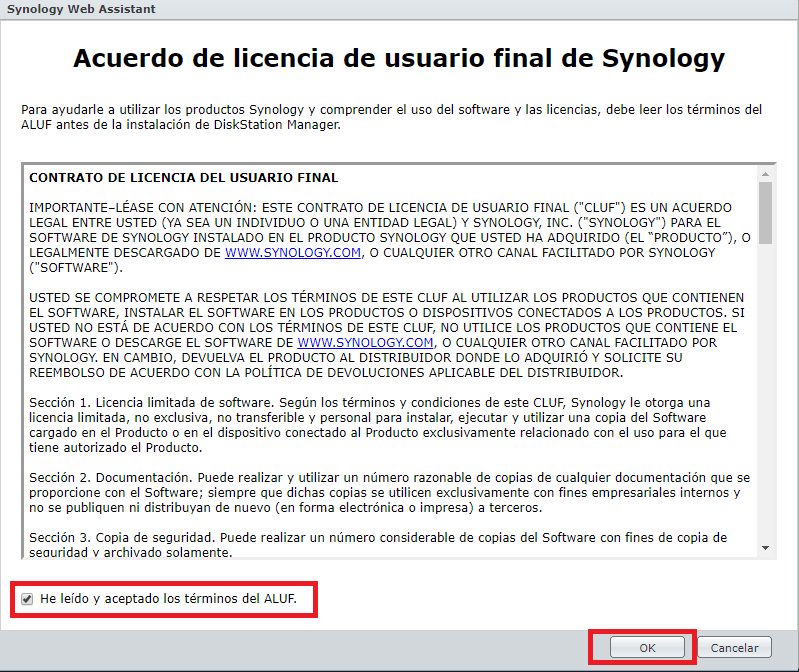
Click on connect, tick the box to accept the terms and conditions, the OK button is activated and click on it.
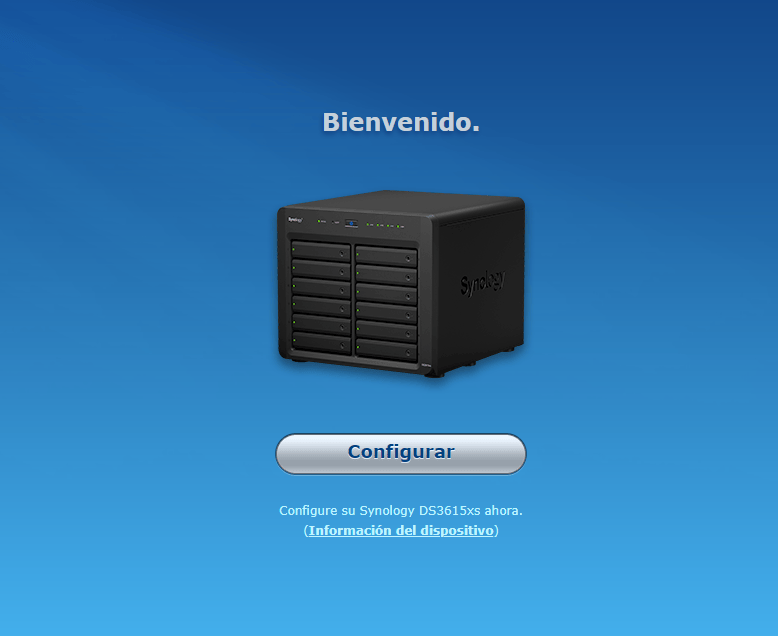
Click on configure
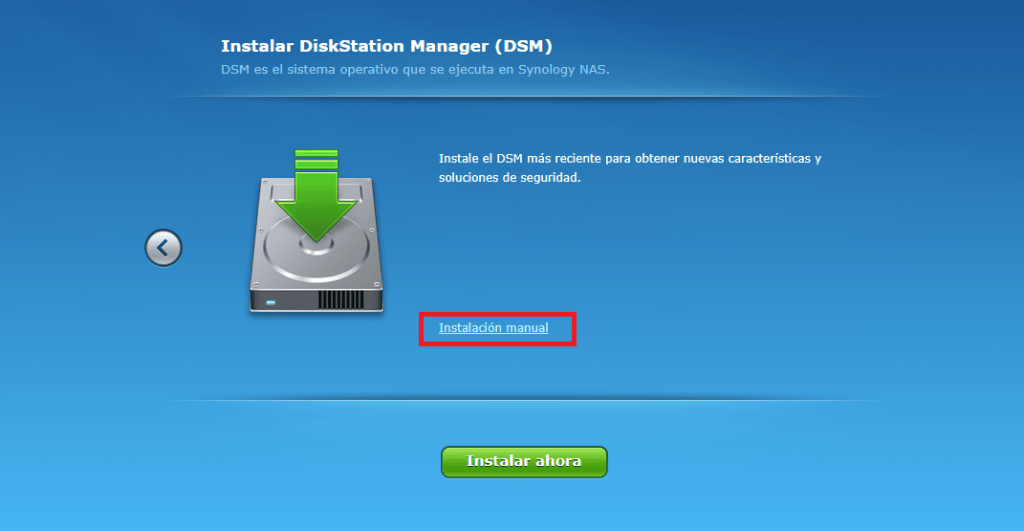
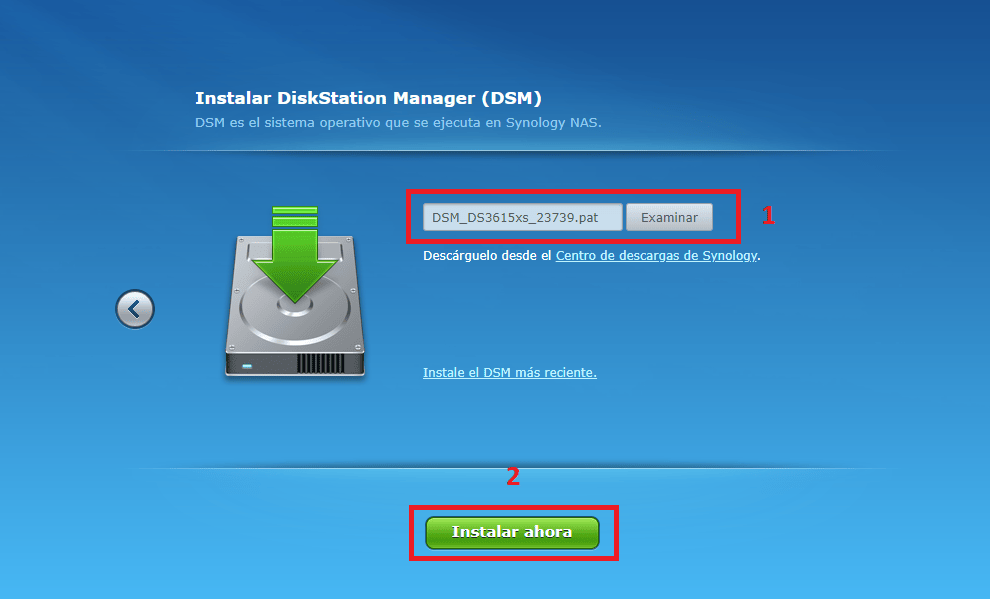
In this step we have to download the .pat file corresponding to the boot version we have used.
When it is downloaded, click on manual installation and select it and click on install now.
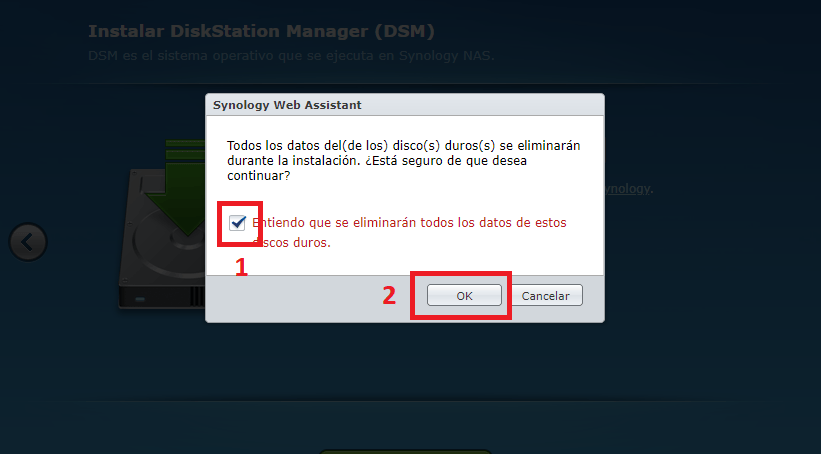
At this point it warns you that the hard disks you have connected will be formatted and all data will be lost.
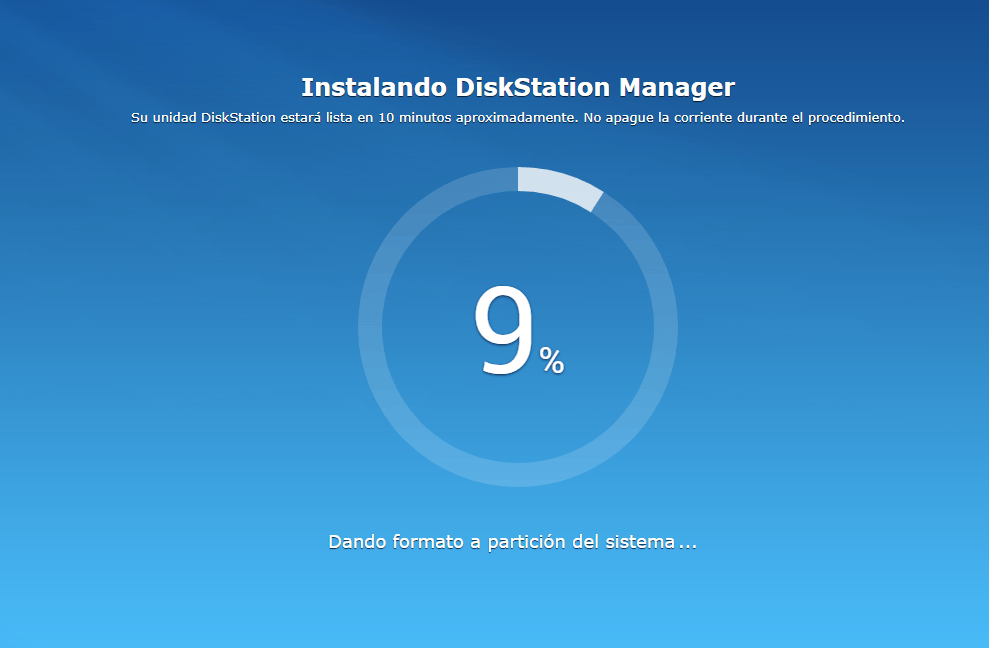
And the installation begins…
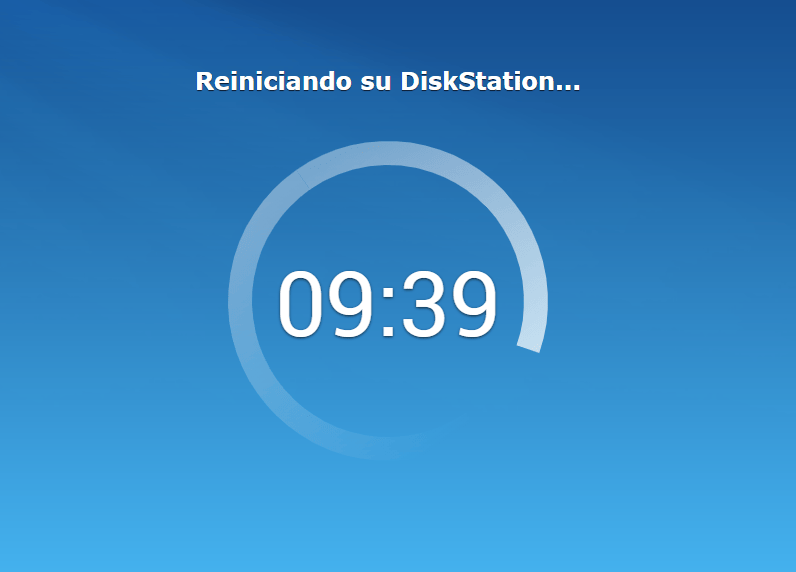
When finished, the computer will reboot itself and you will see a countdown that lasts approximately 10 minutes.
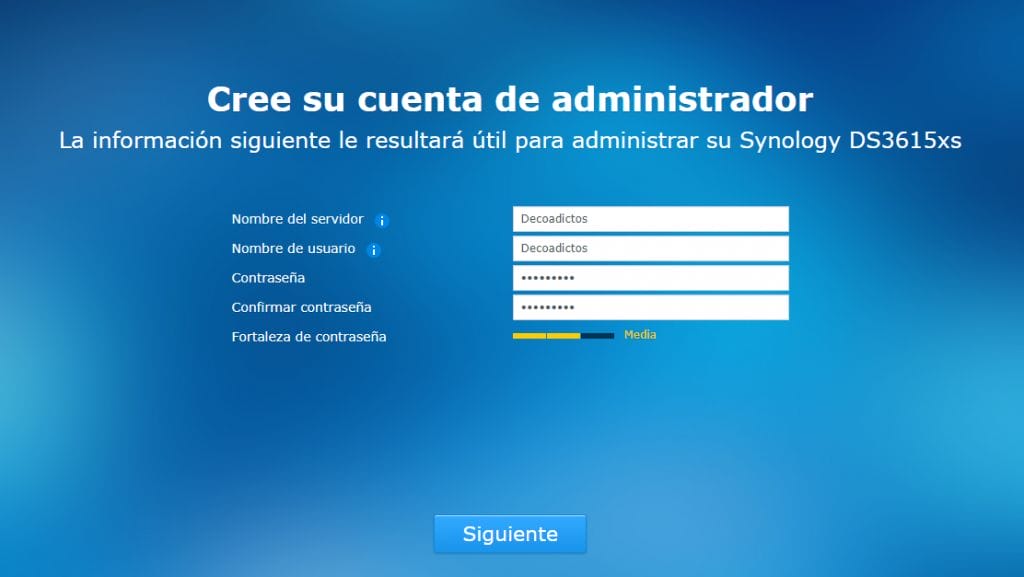
When it restarts, the installation will be finished, you only have to fill in the access data such as user name, password…
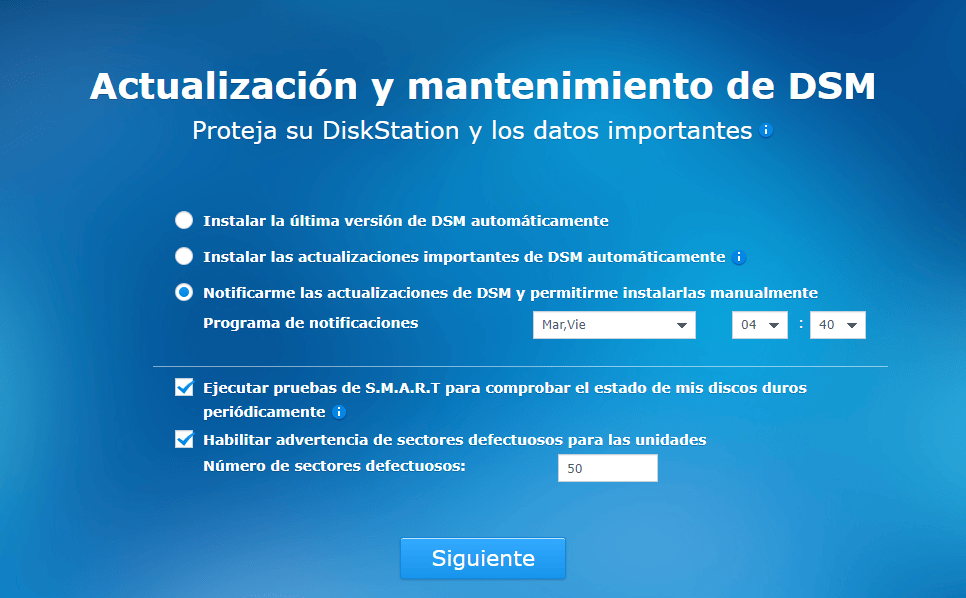
This step is very important to avoid being left without XPEnology because of an unwanted upgrade.
Click on omit, as XPEnology does not have access to QC.

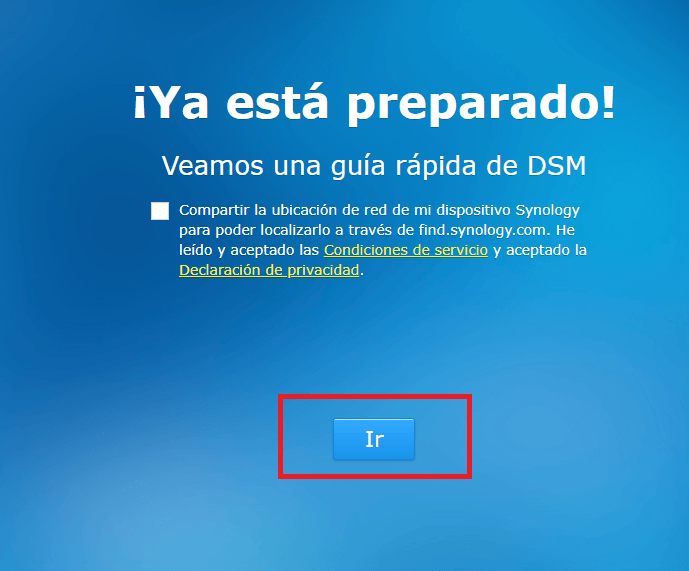
When you click on IR, you are already inside DSM. In the next entries we will configure shared folders, install programs and many other things.